Aperture and Depth of Field in Landscape Photography
Aperture is the camera setting that controls how much of your landscape photograph is in sharp focus — and in a genre where sharpness from foreground to horizon is often the goal, that makes it one of the most important creative decisions you'll make in the field.
But aperture isn't just about getting everything sharp. It's also your primary tool for controlling depth of field — the zone of acceptable focus that extends through your image.
Understanding how aperture works, which f-stops to use, and when to break the rules gives you direct control over what the viewer sees and how they experience the scene.
For most landscape photography, set your aperture between f/8 and f/11. This range delivers the sharpest results from your lens while keeping enough of the scene in focus from foreground to background. Stop down to f/14 or f/16 only when you have a strong foreground element close to the camera with a distant background — beyond f/16, diffraction softens the entire image and cancels out the depth-of-field gain. Open up to f/2.8 only for two specific situations: isolating a small subject against a blurred background, or shooting the night sky where every part of the scene is at infinity anyway.
This guide covers how aperture affects your landscape photos, the f-stops that matter most, why f/8 to f/11 is the sweet spot for most situations, and when to deliberately use a wider or narrower aperture for creative effect. If you're just getting started, our landscape photography for beginners guide covers the foundational settings you need before diving into aperture.
What Is Aperture and How Does It Work?
Aperture is the adjustable opening inside your camera lens that controls how much light passes through to the camera sensor. Think of it like the pupil of an eye — it gets wider to let in more light and narrower to let in less.
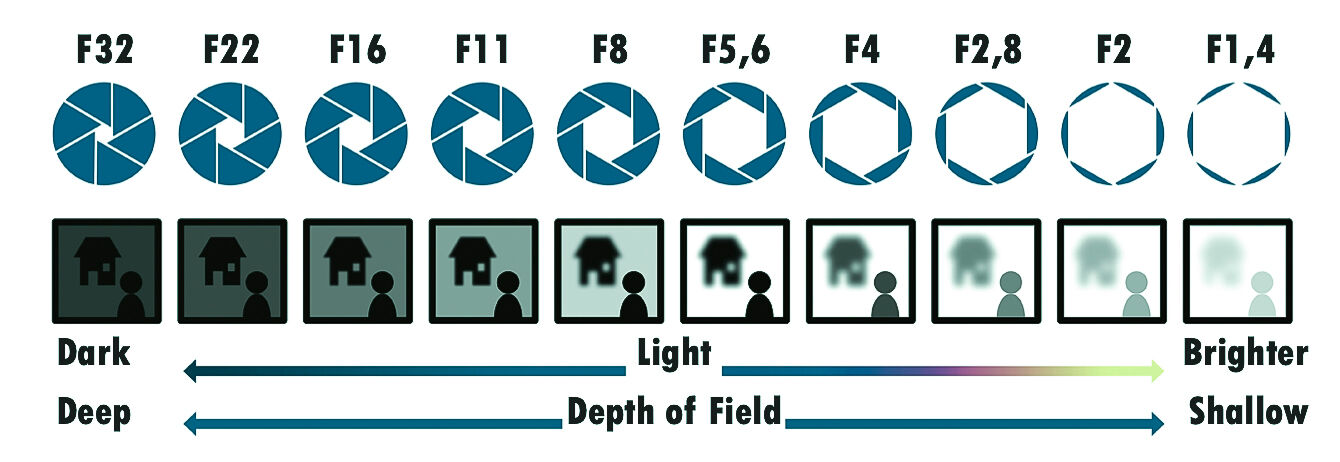
The aperture diameter is measured in f-stops: f/2.8, f/4, f/5.6, f/8, f/11, f/16, f/22.
Here's the part that trips up every beginner: a smaller f-number means a wider opening and more light, while a larger f-number means a narrower opening and less light. It's counterintuitive, but it becomes second nature quickly.
Aperture affects your image in two critical ways. First, it controls exposure — a wider aperture lets in more light, a narrower one lets in less.
Second, and more importantly for landscape photography, it controls how much of the scene appears acceptably sharp from near to far. A smaller aperture number like f/2.8 means less of the scene in focus. A larger number like f/16 means more.
A wide open setting like f/2.8 creates a shallow depth of field — only a thin slice of the scene is sharp, with the foreground and background blurred. A narrower aperture value like f/11 or f/16 creates a larger depth — most of the scene from near to far appears sharp.
This relationship between the aperture value and focus range is the foundation of how landscape photographers compose and control their images in digital cameras.
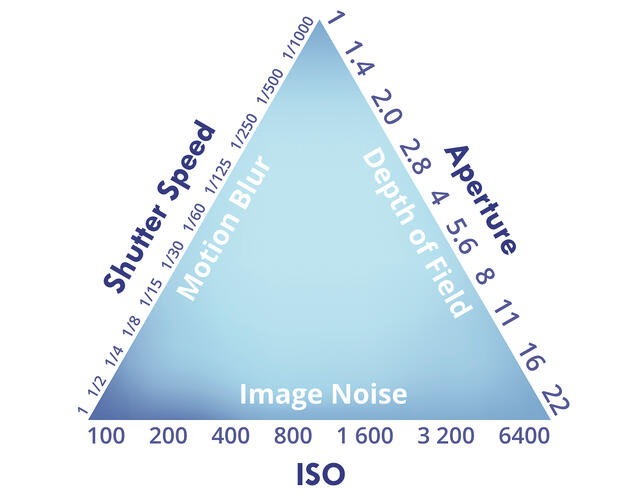
Together with shutter speed and ISO, aperture forms the exposure triangle — the three camera settings that work together to determine how much light reaches the sensor and how the final image looks.
The Sweet Spot: Why f/8 to f/11 Works for Most Landscape Photography
If there's one piece of practical advice I give more than any other when shooting landscapes, it's this: for most landscape photography, set your aperture between f/8 and f/11 and leave it there.
Maximum Sharpness Across the Frame
Every lens has an aperture range where it produces its sharpest results — photographers call this the sweet spot. For the vast majority of lenses, that sweet spot falls between f/8 and f/11. Maximum sharpness is typically found about two stops down from wide open, rather than at the extremes of the aperture range.
At these aperture settings, the lens resolves the finest detail, edge-to-edge sharpness is at its peak, and optical aberrations like chromatic fringing are minimized. Most cameras and lenses achieve their best performance in this range. At wider apertures, lenses generally produce slightly softer images due to optical imperfections that are corrected as you stop down.
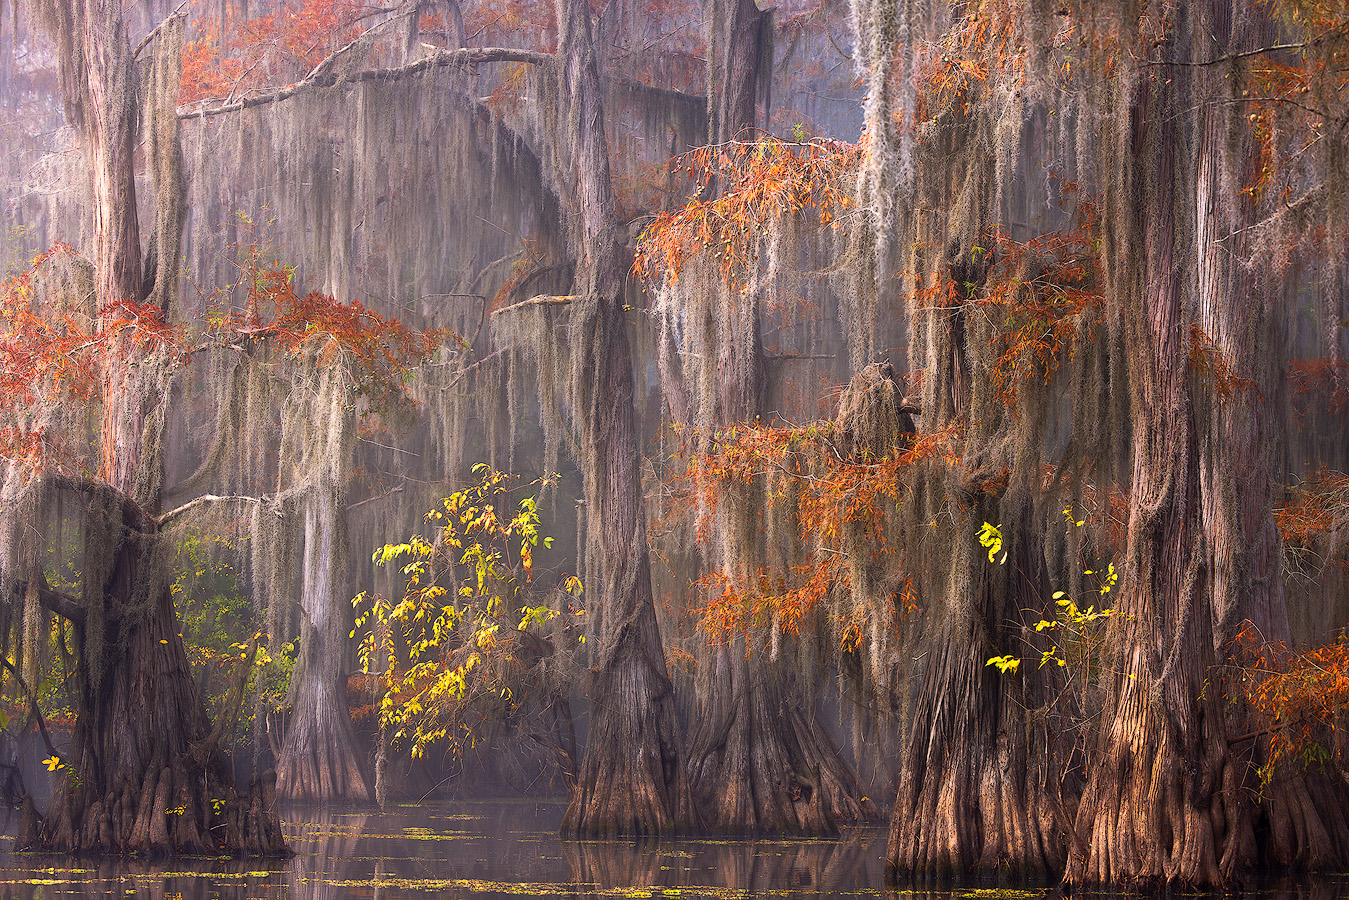
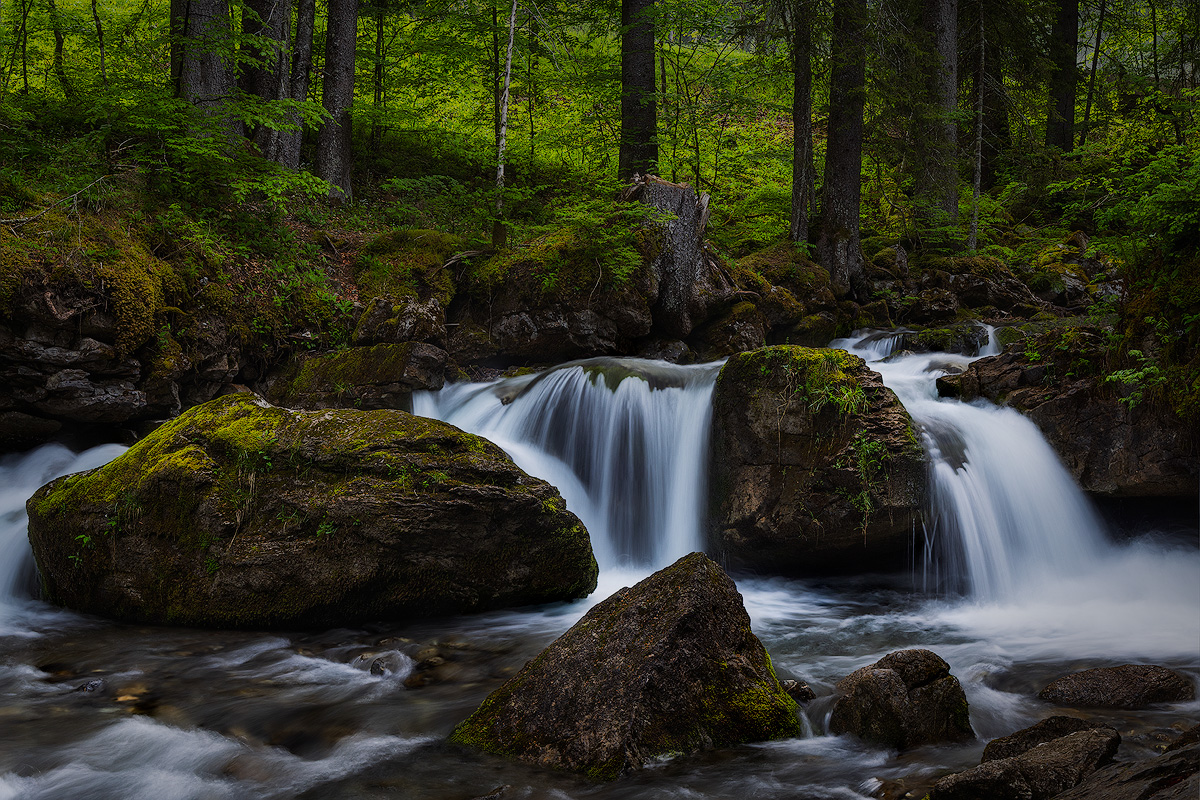
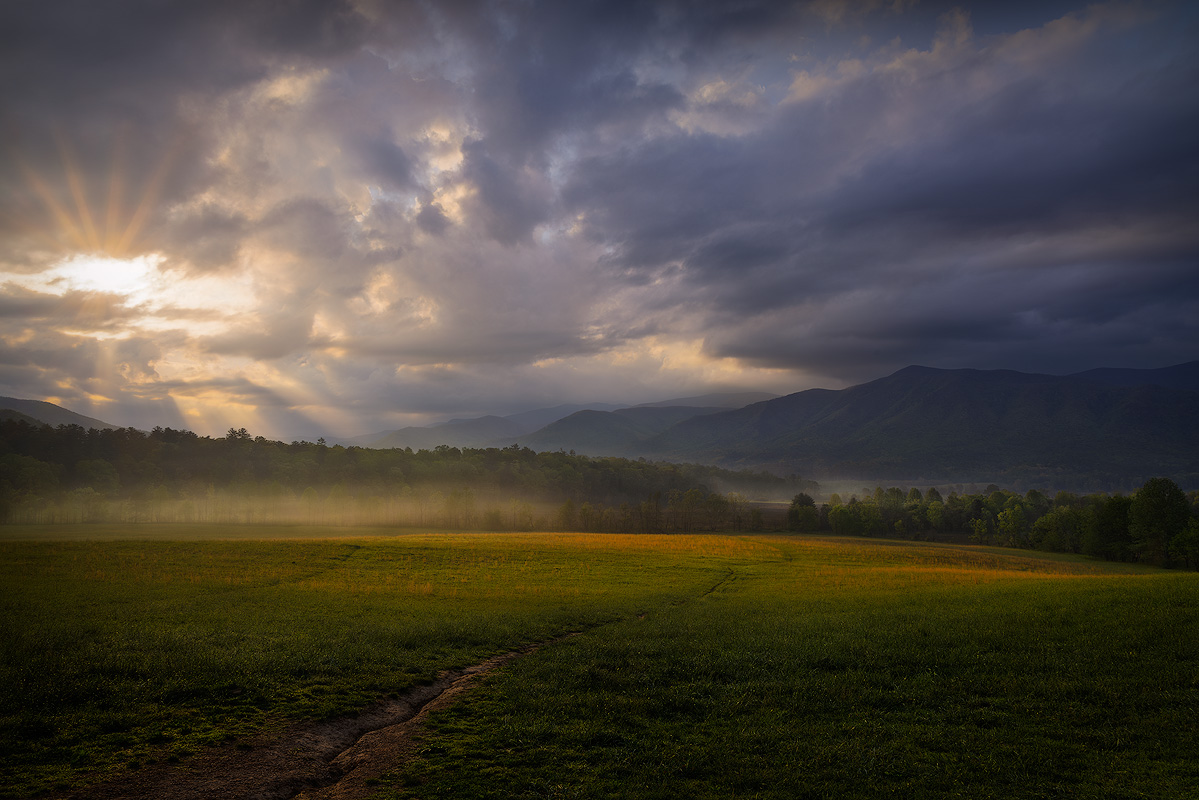
This is where you get landscape photographs that are sharp from the wildflowers at your feet to the distant mountain on the horizon. The entire image holds up under close inspection, whether you're viewing it on screen or printing it large.
This is the full range of sharpness most landscape photographers are after.
Deep Focus Without Diffraction
The temptation for beginners is to use the narrowest aperture available — f/22 or even f/32 — thinking that a tighter opening must mean more of the scene in focus. And in theory, a smaller aperture does increase depth.
But there's a catch. Beyond about f/16, most lenses start to suffer from diffraction — an optical phenomenon where light waves bend as they pass through a very small opening, causing the entire image to soften.
The sharpness you gained from a larger depth gets cancelled out by the softness diffraction introduces.
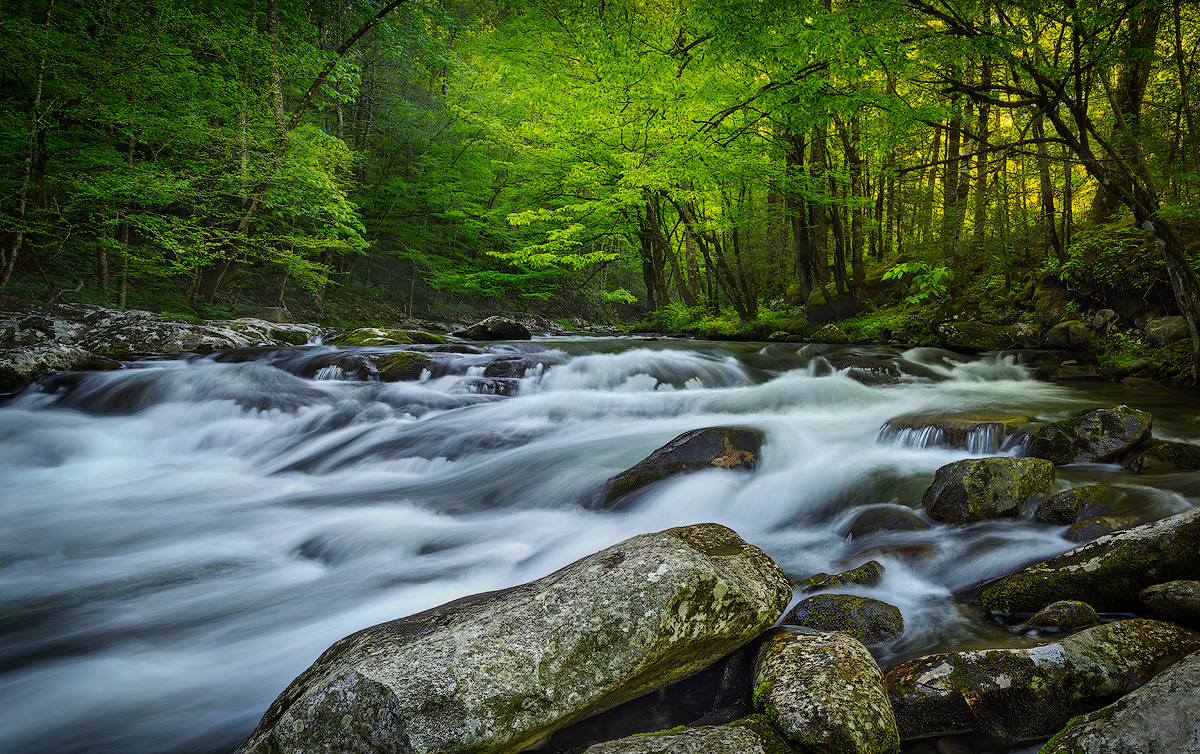
So f/8 to f/11 gives you the best of both worlds: deep focus and maximum sharpness from your lens. It's the range most landscape photographers default to, and for good reason.
When to Use a Narrower Aperture (f/14 to f/16)
There are times when f/8 doesn't provide enough sharpness front to back — typically when you have a strong foreground element very close to the camera combined with a distant background.
Close Foreground with Distant Background
If you're shooting landscape photography with a wide angle lens at a low angle, with a foreground rock or flowers just a foot or two from the lens and mountains in the background, the focus range required to keep both sharp may exceed what f/8 can deliver.
In these situations, stopping down to a smaller aperture like f/14 or f/16 extends the zone of sharpness enough to cover both extremes — from that close foreground to the distant mountain behind it.
I'll occasionally push to f/16 for these compositions, but I rarely go beyond it. The diffraction penalty at f/22 is real and visible — especially if you're planning to print large or crop into the image.
Using a very narrow f-stop like f/22 creates a starburst effect on bright light sources, which can be creative but also softens the overall image.
Hyperfocal Distance
When you need to maximize sharpness from foreground to background, focusing at the hyperfocal distance point is the technique to use. The hyperfocal distance is the focus point that gives you the greatest possible range of acceptable sharpness for a given aperture and lens.
At f/11 with a 24mm wide angle lens, the hyperfocal distance is roughly 4 feet — meaning everything from about 2 feet to infinity will appear sharp. At f/16, that near limit gets even closer.
Learning to calculate or estimate hyperfocal distance for your lens and aperture combination lets you squeeze maximum depth from any scene without resorting to extremely narrow apertures.
Objects at the same distance from the camera will appear equally sharp regardless of where they sit in the frame. As a general rule, when using a smaller aperture, focus about one-third into the scene to maximize sharpness from foreground to background.
PhotoPills and similar apps calculate hyperfocal distance for you in the field — one tap and you know exactly where to set your focus distance with manual focus.
When to Use a Large Aperture (f/2.8 to f/4)
Not every landscape photograph needs front-to-back sharpness. Sometimes a shallow depth of field creates a more compelling image by isolating a subject and simplifying the scene.
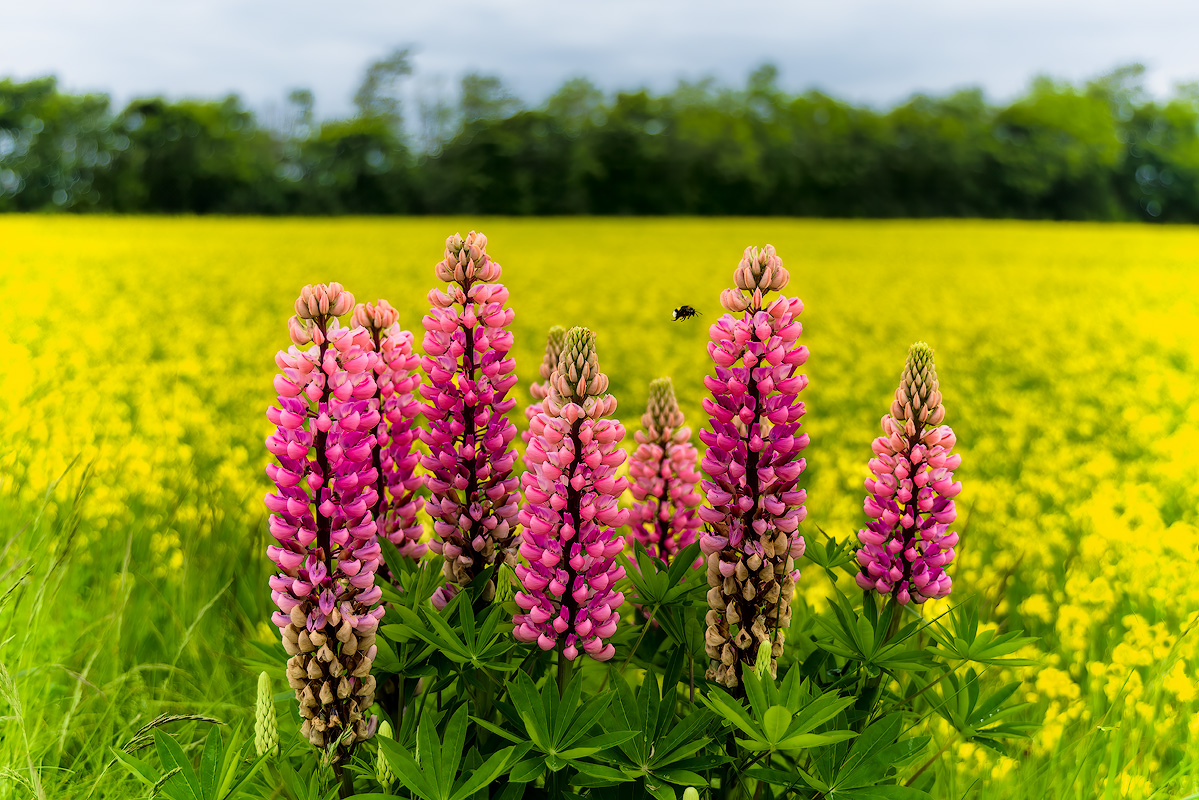
Isolating Details in Landscape Photography
A single wildflower against a blurred meadow. An ice formation with a soft, colorful backdrop. A leaf covered in frost with the rest of the forest dissolved into bokeh.
These are landscape images that use shallow depth of field as a storytelling tool — directing the viewer's attention to one specific element rather than trying to include everything.
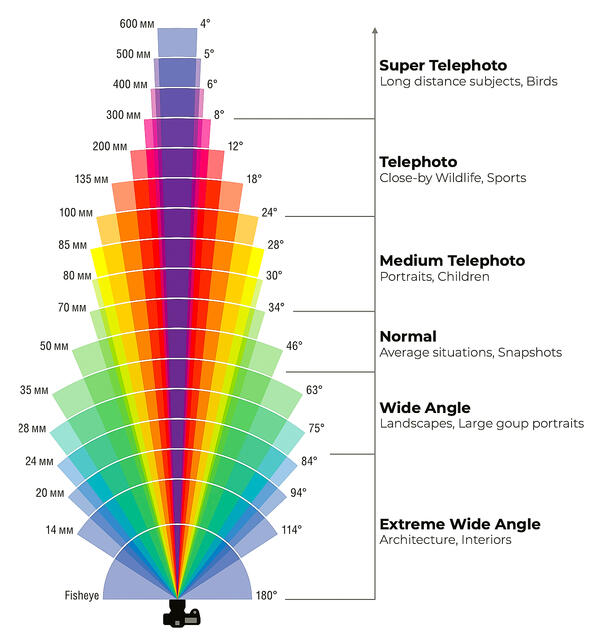
For this kind of work, f/2.8 to f/4 is the range. The wider the opening, the more the background dissolves. Opening up can also create a pleasing blur in the foreground, enhancing the overall composition. The effect is strongest with longer focal lengths and closer focus distances. If you want to dig deeper into how lens choice affects your images, my guide to understanding focal length in landscape photography walks through the creative differences between wide, normal, and telephoto.
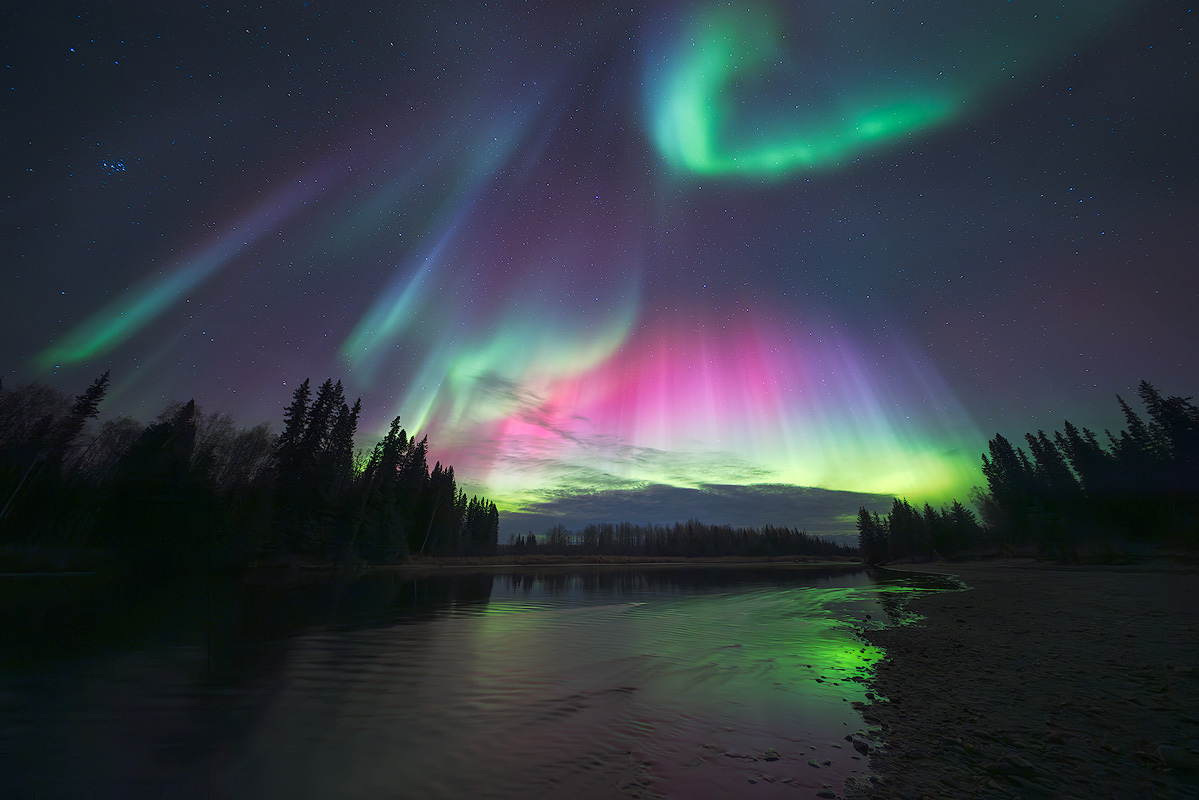
Night Sky and Aurora Photography
A wide aperture serves a completely different purpose at night. When photographing the northern lights, the Milky Way, or star fields in dim conditions, you need as much light as possible reaching the camera sensor in the shortest time.
An aperture of f/2.8 gathers far more light than f/11, which means you can use a lower ISO or a faster shutter speed — both of which improve image quality in digital cameras.
For aurora photography, I shoot almost exclusively at f/2.8 with ISO 1600 to 3200 and shutter speeds of 5 to 15 seconds.
The shallow depth of field isn't an issue because the subject — the sky — is at infinity. Everything in the frame is far enough away that even at f/2.8, the entire scene is effectively in focus.
If you want to learn aurora photography in the field with this kind of setup, my Arctic Norway photography workshop runs each March under boreal forest skies in northern Nordland.
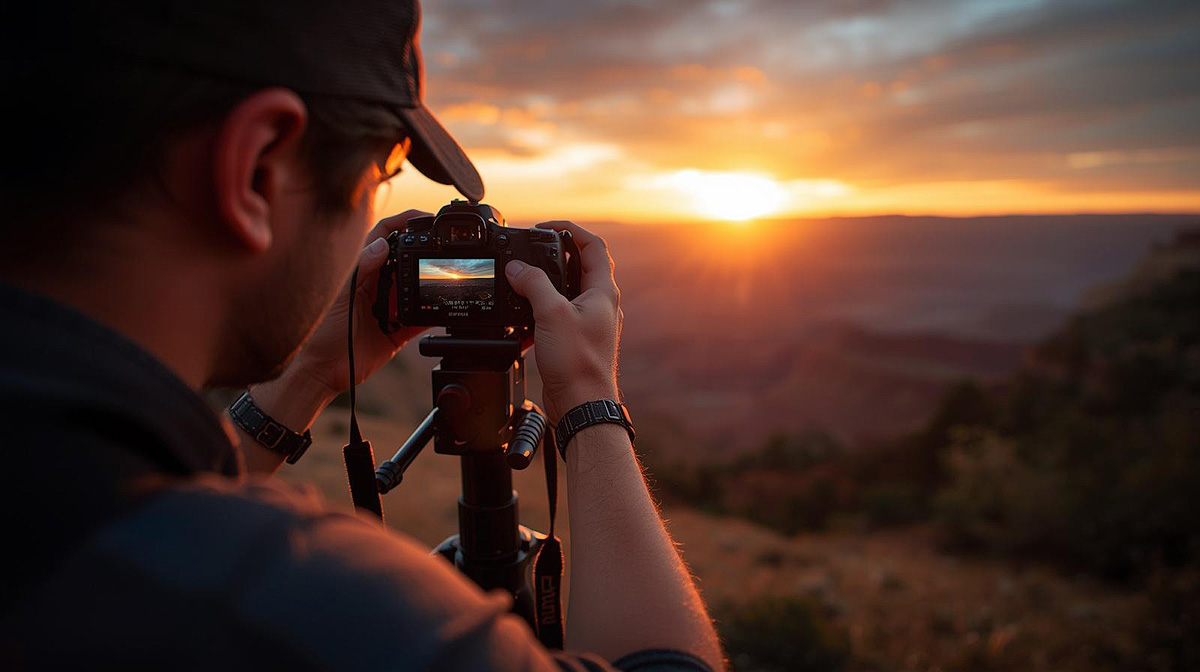
Aperture Priority Mode: The Landscape Photographer's Default
Most landscape photographers spend the majority of their time in aperture priority mode — and there's good reason for that.
In aperture priority mode (marked as A or Av on your camera dial), you choose the aperture and the camera automatically selects the shutter speed to achieve a correct exposure.
Aperture priority mode requires you to set one value while the camera handles the rest. This is ideal for landscape photography because aperture — and the depth of field it controls — is usually the most important decision.
When you're on a tripod, the specific shutter speed matters less because the camera isn't moving. Shutter speed is only critical for about 5% of landscape shots — most can be taken without adjusting it frequently.
As lighting conditions shift, the camera will automatically change the shutter speed to maintain your chosen exposure. This lets you stay focused on composition and reading the light rather than constantly adjusting multiple camera settings.
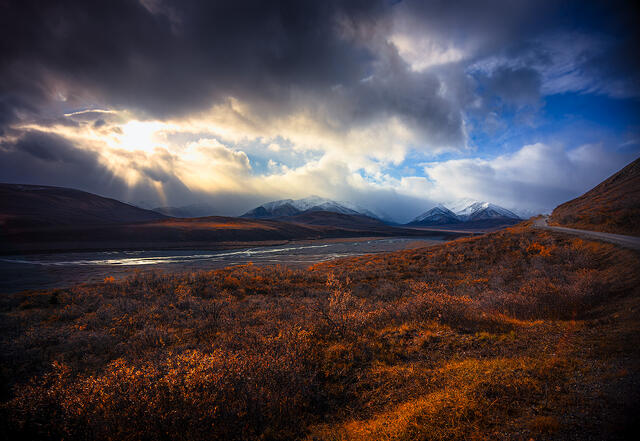
When the light changes rapidly at sunrise and sunset, aperture priority mode adapts automatically while preserving your chosen aperture. Aperture priority mode is faster to use than manual mode, especially in changing light conditions — and in landscape photography, a low ISO setting is recommended to ensure the best results from your camera sensor.
Most cameras also offer auto ISO, which works alongside aperture priority mode to maintain proper exposure across changing conditions. When I'm doing landscape photography on a tripod, I keep auto ISO turned off and set ISO manually to base ISO — typically ISO 100 — for the cleanest possible image.
But when shooting handheld, auto ISO can be useful as a safety net in aperture priority mode, letting the camera raise ISO rather than dropping below your minimum shutter speed.
On a tripod in aperture priority, you want the lowest ISO and whatever long shutter speed the camera needs. Handheld, you want the camera to protect your minimum shutter speed even if that means higher ISO.
When to Switch to Manual Mode
Switch to manual mode when you need precise control over both aperture and shutter speed simultaneously. Manual mode is essential when you're deliberately creating a long exposure shot with motion blur and need a specific long shutter speed while also controlling the focus range.
Also use manual mode when shooting in tricky lighting conditions where the camera's meter might be fooled, such as bright light reflecting off snow or backlit compositions.
In manual mode, set your aperture for the creative look you want, set your shutter speed for the desired motion effect or exposure, and adjust ISO as needed.
Use the histogram to verify your exposure rather than trusting the image preview on the LCD screen, which can be misleading in bright or dark conditions.
While landscape photography rarely calls for shutter priority mode, it's worth knowing it exists — it locks in shutter speed and lets the camera choose aperture. For most landscape photography work, aperture priority mode or full manual gives you better creative control.
Aperture, Exposure Compensation, and the Exposure Triangle
Aperture doesn't work alone. Every aperture change affects how much light reaches the camera sensor, which means shutter speed or ISO must compensate.
Narrowing the aperture from f/8 to f/11 reduces the light by one stop. To maintain the same exposure, you either use a longer shutter speed (letting the shutter stay open twice as long) or raise ISO by one stop.
On a tripod, the shutter speed trade is easy and free — it costs you nothing in image quality or dynamic range. Raising ISO costs you noise, dynamic range, and image sharpness in the shadows.
This is why the tripod-plus-base-ISO approach is so powerful for landscape photography. You choose the aperture you want. You keep ISO at base ISO — typically ISO 100 — for maximum image quality and dynamic range.
Using a tripod allows you to use lower ISO settings, which results in less noise and higher fidelity. Using the lowest ISO produces clean, noise-free images and captures the highest amount of dynamic range possible. To achieve the best results, always start at base ISO and adjust from there as needed.
For the best landscape photographs, shoot in raw format with an aperture around f/11 to f/16 and the lowest ISO possible. Raw files give you far more latitude in post processing than JPEGs.
And you let shutter speed absorb whatever adjustment is needed. The camera sits still. The sensor collects clean, detailed light information. The final image is as good as your camera is capable of producing.
Exposure compensation is your tool for fine-tuning this balance in aperture priority mode. When the camera's meter misreads a scene — underexposing snow, overexposing a dark forest — you dial in exposure compensation to correct it without leaving aperture priority mode.
I use exposure compensation constantly in the field, often +1 to +1.5 stops for bright snow scenes and -0.5 to -1 for moody backlit compositions.
Always check the histogram after each frame. The histogram gives you accurate light information about your exposure that the LCD preview screen cannot.
If highlights are clipping on the right edge or shadows are crushing on the left, adjust your exposure compensation accordingly.
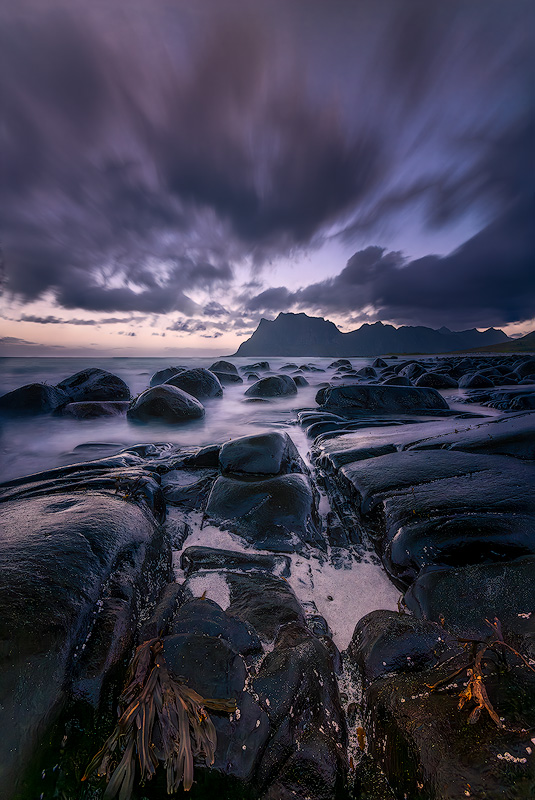
In strong daylight conditions, you may find that even at base ISO and a narrower f-stop like f/16, the camera still can't achieve a slow enough shutter speed for a long exposure shot.
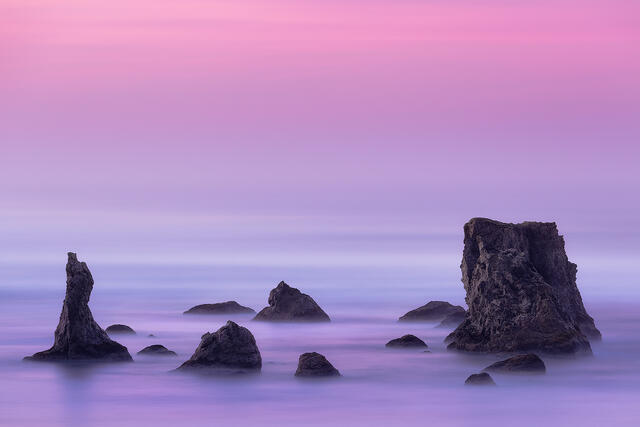
This is where neutral density filters become essential — they reduce incoming light, letting you use longer shutter speeds for silky water or streaking clouds without overexposing the image. Neutral density filters expand your creative options in bright light without forcing you to compromise on aperture settings. A long exposure in landscape photography often requires neutral density filtration to achieve the desired motion effect.
For more on choosing the right exposure time for moving water, clouds, or aurora, see my guide to shutter speed in landscape photography.
Focus Stacking: When Aperture Alone Isn't Enough
In some extreme compositions — usually ultra-wide angle shots with foreground elements just inches from the lens — even f/16 can't deliver enough sharpness from near to far in a single shot.
The technique involves taking multiple exposures of the same composition, each focused at a different focus distance — one on the near foreground, one on the middle ground, one on the distant background.
You then blend them together in post processing software like Adobe Photoshop or Helicon Focus, producing a single final image with sharpness that exceeds what any single aperture could achieve.
The key is to shoot all frames at f/8 to f/11 — the lens's sharpest aperture — rather than trying to get everything sharp in one frame at f/22. You get maximum depth with the optical performance of f/8.
It takes more work, but for certain compositions it produces dramatically better photographs. A sturdy tripod is necessary for techniques like HDR, panoramas, and multi-frame stacking — all of which produce sharper results by combining precisely aligned frames.
Modern zoom lenses sometimes lack detailed focusing scales, which can make setting precise focus points more challenging than with older manual focus lenses. In these cases, using live view to zoom in and confirm focus at each distance is the most reliable method.
Common Aperture Mistakes in Landscape Photography
Always shooting at f/22. Narrower isn't always better. Diffraction softens your entire image at extreme f-stops. Stay in the f/8 to f/16 range for the sharpest landscape photos.
Never changing from f/8. While f/8 is a great default, there are compositions where you need a larger depth (f/14–f/16 for close foregrounds) or a shallow depth of field (f/2.8–f/4 for isolating details or shooting night sky). Adapt your aperture settings to the scene — that flexibility is what separates good landscape photography from great.
Ignoring camera shake. Narrowing the aperture without compensating for the reduced light results in underexposed images. On a tripod, the fix is simple — let the shutter speed get slower.
But if you're shooting handheld, a narrower aperture can force you into a slow shutter speed below your minimum shutter speed for sharp handheld shots. To avoid camera shake when shooting handheld, use the reciprocal rule: your shutter speed should be at least 1/focal length.
Use the shutter button gently, or better yet, use a remote or the camera's self-timer.
Not checking focus in live view. Most cameras have a focus preview button that stops the lens down to your selected aperture value so you can see what will actually be sharp. Use it.
Or zoom into your live view display to check focus at the edges of the frame before committing to the shot.
What Happens When You Master Aperture
Once you internalize how aperture controls your image, you stop thinking about f-stops as numbers and start thinking about them as creative choices.
You walk up to a scene and instinctively know whether it needs deep focus or shallow isolation. You see the focus range in your mind before you adjust the dial.
Combined with shutter speed and ISO, aperture gives you full creative control over how your landscape photographs look and feel. Sharp front to back, or soft and dreamlike. Every element in focus, or one subject commanding attention against a blurred backdrop.
The choice is yours — and making it deliberately instead of defaulting to Auto is what separates snapshots from better photographs that connect with viewers.
Face The Outdoors Photography workshops are built around making these decisions in the field — working through real compositions with an experienced landscape photographer showing you the difference f/8 versus f/2.8 makes on the same scene. It's the fastest way to build the instinct that turns camera settings into creative expression.
FAQ — Aperture in Landscape Photography
What is the best aperture for landscape photography?
f/8 to f/11 for most landscape photography situations. This range delivers the sharpest results from your lens while providing enough sharpness from foreground to background.
Only deviate when you specifically need a larger depth (f/14–f/16 for extreme close foregrounds) or a shallow depth of field (f/2.8–f/4 for isolating details or night sky work).
What is depth of field in landscape photography?
The zone of distances in your image that appear acceptably sharp. A deep depth of field means most of the scene — from near to far — is in focus.
A shallow depth of field means only a narrow slice is sharp while the rest is blurred. In landscape photography, a deep depth of field is the most common goal, achieved through narrower aperture values like f/8 to f/16.
Why are my landscape photos soft at f/22?
Diffraction. When light passes through a very narrow aperture, the light waves bend and interfere with each other, causing the entire image to lose sharpness. Most lenses begin showing visible diffraction effects beyond f/16.
For sharper results, shoot at f/8 to f/11 and use focus stacking if you need more sharpness than those apertures provide.
Should I use aperture priority or manual mode for landscapes?
Aperture priority mode is the best starting point for most landscape photographers. It lets you control your aperture — usually your most important creative decision — while the camera handles shutter speed.
Use exposure compensation to fine-tune brightness. Switch to manual mode when you need precise control over both aperture and shutter speed, such as during long exposure work or in tricky lighting conditions where the camera's meter struggles.
What is hyperfocal distance?
Hyperfocal distance is the focus point that maximizes the range of acceptable sharpness for a given aperture and focal length. When you focus at the hyperfocal distance, everything from half that distance to infinity appears sharp.
Apps like PhotoPills calculate it automatically. This technique is especially useful with wide angle lenses when you need sharpness from a close foreground all the way to the distant background without resorting to extremely narrow apertures.
When should I use a wide aperture for landscape photography?
Use f/2.8 to f/4 when you want to isolate a single subject with a blurred background — a wildflower, a frost pattern, a detail in the landscape. A wide aperture like this creates strong background separation.
Also open up to f/2.8 for night sky and aurora photography, where gathering maximum light in low light conditions is more important than deep focus. At night, subjects are far enough away that even f/2.8 produces sharp results across the entire frame.