Landscape Photography for Beginners: A Field Guide to Capturing Your First Great Shot
I didn't go to school for photography. Nobody handed me a camera and a textbook and walked me through the fundamentals. I picked up a camera, walked outside, started taking photos, and got most of them wrong for a long time.
That's not a humble brag. It's context. Because if you're reading this as someone who's just getting into landscape photography — maybe you bought your first real camera, maybe you've been shooting on your phone and want to understand what's possible with manual controls — I want you to know that the learning curve is real, but it's not as steep as the internet makes it look.
This guide is what I wish someone had given me when I was starting out. Not a gear catalog. Not a list of rules with no explanation. Just the honest, practical stuff that actually matters when you're standing in front of a landscape with a camera and no idea where to begin. Professional photographers like Ansel Adams spent years developing their craft — and even with glass plates as their early medium, the fundamentals haven't changed.
You Don't Need Expensive Gear to Start
Let me get this out of the way right now, because it's the first thing that stops people from shooting landscapes: you do not need a $3,000 camera and a bag full of lenses to take great landscape photos. You just don't.
The Camera You Have Is Enough (For Now)
If you have a camera with manual controls and the ability to shoot in RAW, you have everything you need to learn landscape photography. That includes most entry-level DSLR cameras, mirrorless cameras, and even some advanced point-and-shoots. Sensor size matters — a full-frame sensor captures more dynamic range than a crop sensor — but that's an upgrade to think about later, not a barrier to starting.
I shot images I'm still proud of with a crop-sensor camera and a kit lens. The fundamentals — light, composition, timing, patience — have nothing to do with how many megapixels you're working with. Don't let gear anxiety keep you indoors. Get out and shoot with what you've got.
The upgrade path exists when you're ready for it. But the camera doesn't make the photographer. The eye does. The patience does. The willingness to stand in bad weather for good light does.
Three Accessories That Actually Make a Difference
If you're going to invest in anything early on, these three accessories will do more for your landscape photographs than a lens upgrade:
A sturdy tripod — not the $30 one from the department store. A solid, reliable tripod that won't vibrate in wind and can hold your camera steady for long exposures. It doesn't need to be carbon fiber. It just needs to not move.
A circular polarizing filter — this attaches onto the front of your lens and cuts glare from water and foliage while deepening blue skies and creating good contrast. The difference it makes on an overcast day shooting a forest or stream is dramatic. It's one of the few filters that can't be replicated in post-processing.
A remote shutter release or intervalometer — even pressing the shutter release button introduces camera shake. A basic wired remote control costs under $20 and lets you trigger the camera without touching it. If you don't have one yet, use your camera's 2-second timer as a workaround.
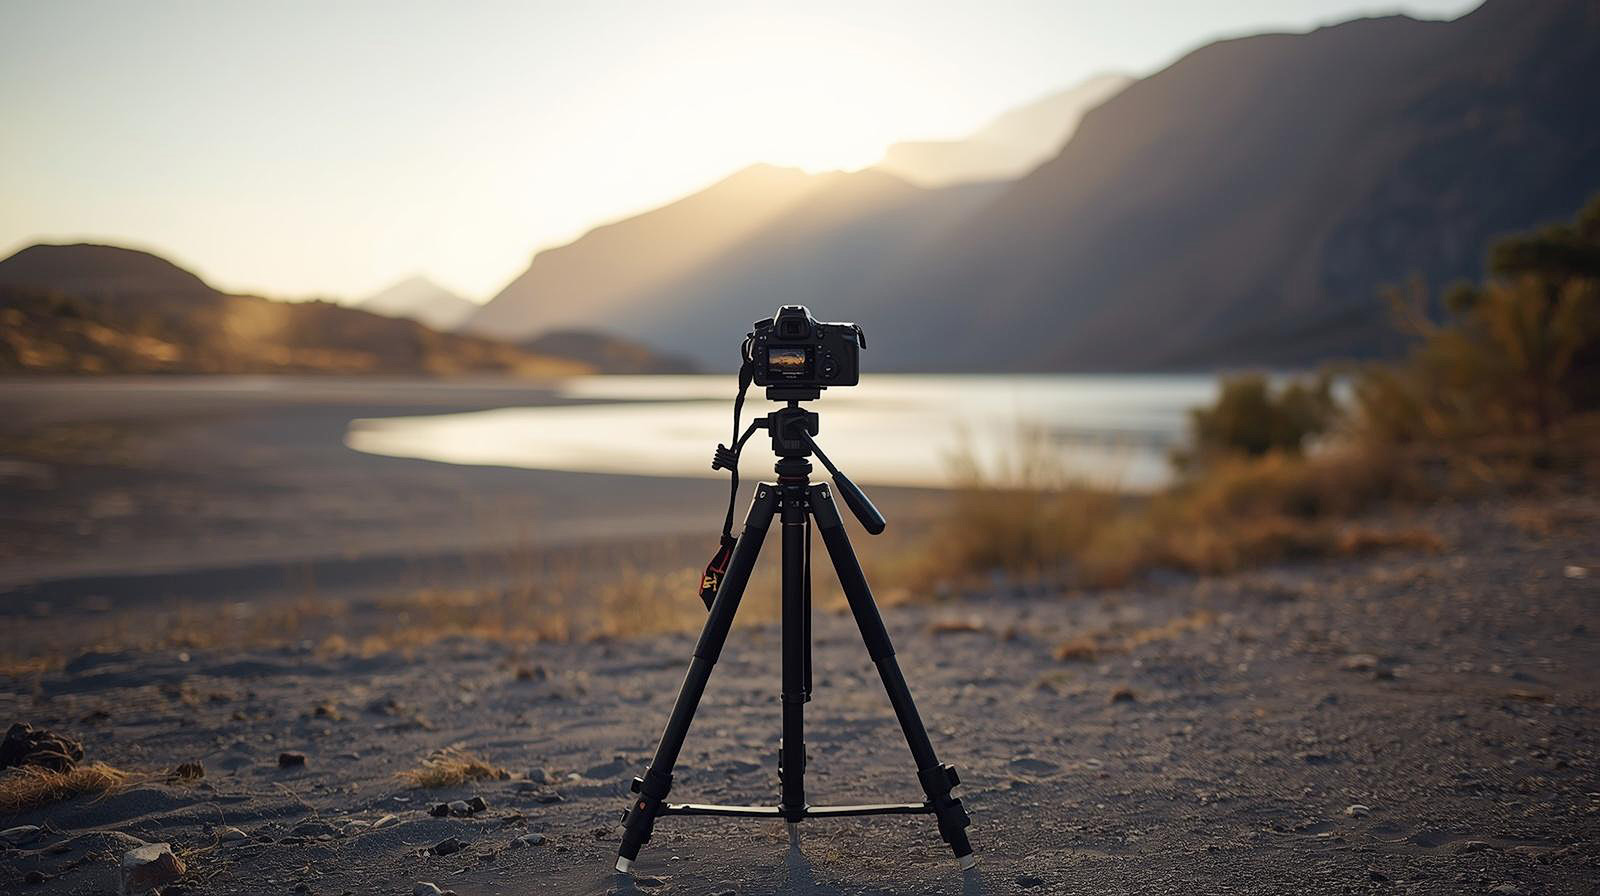
Why a Tripod Matters More Than a New Lens
I keep coming back to the tripod because it changes how you work. When you handhold a camera, you're reactive. You grab shots. When your camera is on a tripod, you slow down. You compose deliberately. You study the edges of the frame. You wait for the best light.
That behavioral shift — from reactive to deliberate — is the single biggest leap most photographers make when shooting landscapes. And it costs less than a wider lens.
Understanding Your Camera Settings for Landscapes
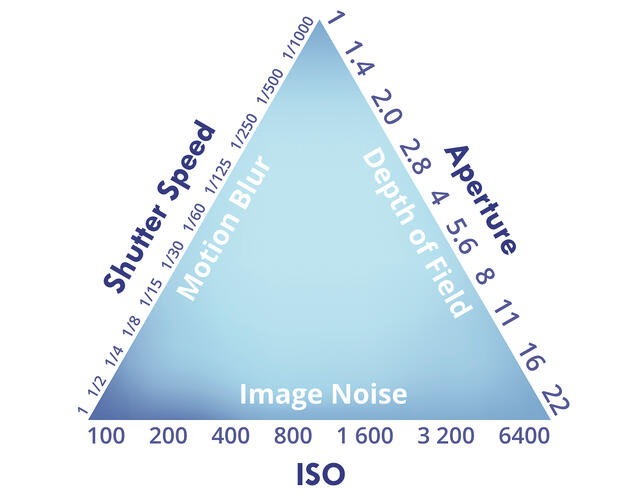
Camera settings can feel overwhelming when you're starting out. There are a lot of dials and menus and acronyms. But for landscape photography, you really only need to understand a handful of settings well. Together, aperture, shutter speed, and ISO form the exposure triangle — and once you understand how they interact, you'll know how to get a correct exposure in any scene.
Aperture and Depth of Field — What f/8 to f/11 Actually Means
Aperture controls how much of your scene is in sharp focus — what photographers call depth of field. A low number like f/2.8 means a narrow slice of the landscape image is sharp (great for portraits, not great for landscapes). A high number like f/11 means most of the scene from front to back is sharp.
For landscape photography, f/8 to f/11 is your starting point. This range gives you deep depth of field while keeping your lens at its sharpest. Most lenses have a sweet spot in this mid-range. Avoid using a very small aperture like f/22 — diffraction starts softening the image at extreme f-stops.
For a complete guide to aperture in landscape photography, including hyperfocal distance, when to break the f/8 rule, focus stacking for ultra-wide compositions, and how aperture choices change for night sky and aurora work, see my aperture breakdown.
Shutter Speed — When to Go Slow and When to Freeze
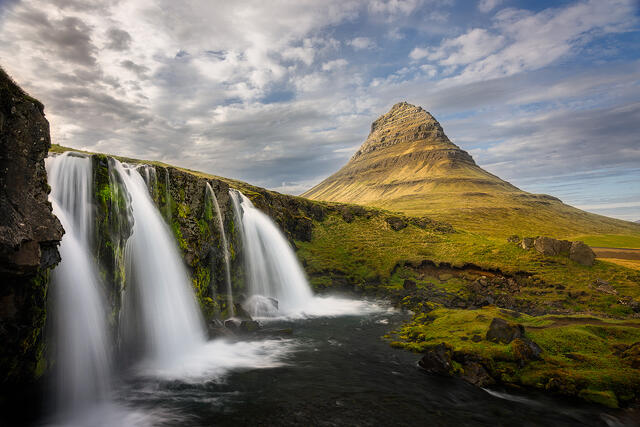
Shutter speed controls how long the camera sensor is exposed to light. A fast shutter speed (1/500 second) freezes everything. Slow shutter speeds (1/4 second or longer) blur motion — and this is where landscape photos start to get interesting.
For landscapes, you'll use both. Fast shutter speeds for sharp, detailed scenes on windy days or when photographing wildlife. Slow shutter speeds for silky waterfalls, smoothed ocean waves, or streaking clouds. This is where the tripod becomes essential — any exposure longer than about 1/60 second will show camera shake if you're handholding.
Don't be afraid to experiment. Take the same waterfall shot at 1/500, 1/4 second, 1 second, and 5 seconds. See how the water transforms. That's how you develop a feel for it. For a deeper guide to shutter speed in landscape photography, including silky water techniques, freezing crashing waves, and intentional camera movement, see my full breakdown.
ISO — Keep It Low, Keep It Clean
ISO controls your camera's sensitivity to light. Lower ISO (100–400) produces clean images with rich detail and smooth tonal transitions. Higher ISO (800+) introduces noise — grain that degrades image quality and makes it harder to capture a sharp image.
For landscape photography, keep your ISO as low as possible. Use ISO 100 as your default and only raise it when you can't get a correct exposure through aperture and shutter speed adjustments alone. With your camera on a tripod, you can use long exposures instead of high ISO to compensate for low light. That's the trade you want to make. For a complete guide to ISO and image quality in landscape photography, including how to manage noise, when to push ISO higher for aurora and wildlife, and the difference between luminance and chromatic noise, see my ISO breakdown.
Shooting in RAW vs. JPEG (and Why It Matters)
When you shoot in JPEG, your camera processes the image and throws away data it considers unnecessary. When you shoot in RAW, it keeps everything. Every bit of color information, every shadow detail, every highlight that might otherwise be clipped.
RAW files look flat and dull straight from the camera — that's normal. They're designed to be processed. But the dynamic range you can recover from a RAW file compared to a JPEG is massive. If you blow out the brightest area of a sky or underexpose a foreground, RAW gives you room to fix it. JPEG does not.
Switch to RAW now. You'll thank yourself later when you start editing your landscape photographs.
How to See and Compose a Landscape Photograph
Composition is the arrangement of other elements within your frame. It's what separates a snapshot from a photograph. And while there are guidelines to help, the real skill is learning to see — to look at a scene and identify what's worth including and, just as importantly, what to leave out. Good composition is the foundation of great landscape photos.
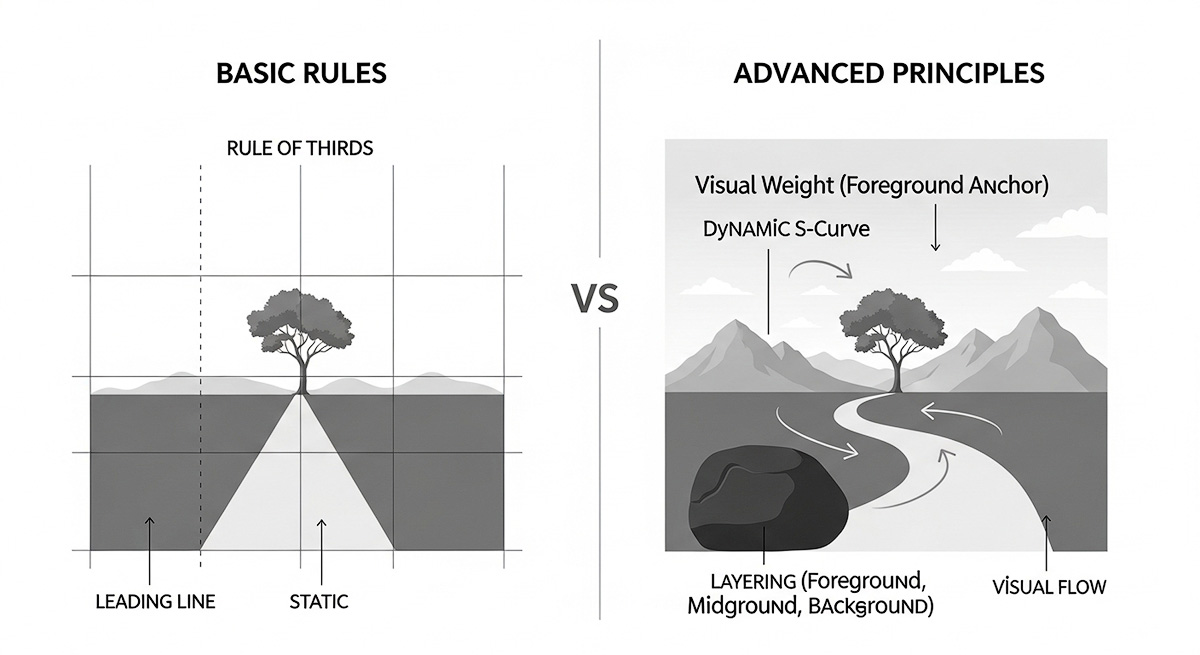
The Rule of Thirds as a Starting Point
Imagine two horizontal lines and two vertical lines dividing your frame into nine equal rectangles. Placing key elements — the horizon line, a prominent tree, a mountain peak — along these lines or at their intersection points tends to create a more balanced, pleasing composition.
This is the rule of thirds, and it works. Put the horizon on the top third or bottom third instead of dead center. Place your primary subject on one of the four intersection points. This simple shift immediately improves most beginner landscape photographs.
But treat it as training wheels, not law. There are plenty of situations where centering your subject creates a stronger image. Reflections on still water, for example, demand symmetry — centering your subject with equal visual weight on both sides often creates a more powerful image than following the rule of thirds. Many photographers break the rule of thirds once they understand why it works in the first place.
Foreground, Middle Ground, Background — Building Layers
The most effective landscape images have a sense of depth — a feeling that you could step into the scene and walk forward. Creating depth comes from layering your composition into three zones: foreground, middle ground, and background.
The foreground is what's closest to the camera — rocks, flowers, frost patterns, tide pools. The middle ground is the main subject area — a lake, a treeline, a meadow. The background is the distant element — mountains, sky, the horizon line.
When all three layers work together, the photograph gains dimension. The viewer's eye travels through the image rather than bouncing off the surface. This is one of the most important landscape photography composition tips I can offer, and it took me years of flat, one-dimensional photos before I understood it.
Leading Lines and Natural Framing
Leading lines are elements in the scene that guide the eye from one part of the image to another. Rivers, trails, fences, ridgelines, and shorelines all serve as natural leading lines. Position yourself so these lines enter the frame from a corner or edge and draw the eye toward your primary subject.
Natural framing uses elements in the scene — overhanging tree branches, cave openings, rock arches — to create a frame within the frame. This focuses attention on the subject and adds more detail and depth to the landscape image.
Simplify — What to Leave Out of the Frame
This is one beginners struggle with most. When you're standing in front of a vast landscape, the temptation is to include everything. But a cluttered frame with no clear subject produces a photograph that feels directionless.
Ask yourself: what's the one thing I want the viewer to see? Then remove everything that distracts from it. Move left, right, up, down. Change your focal length. Get closer. If trees or branches are poking into the edge of the frame and adding nothing, adjust your position until they're gone. Simplification is one of the strongest tools you have for building good composition.
Light Is Everything — When to Shoot and When to Wait
If there's one section of this guide I want you to remember, it's this one. Light is the single most important variable in landscape photography. Good light can make a parking lot look interesting. Bad light on a bright sunny day can make the Grand Canyon look flat.
Golden Hour and Blue Hour for Beginners
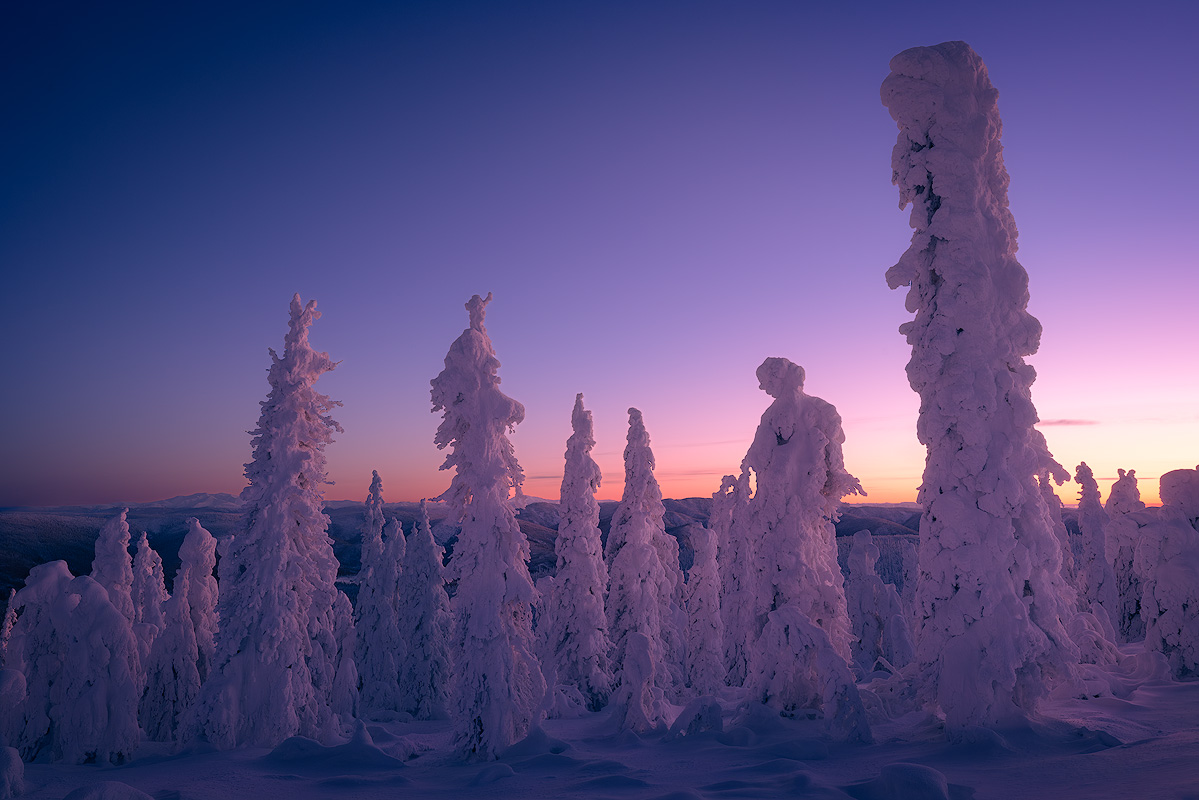
Golden hour is the period just after sunrise and just before sunset when the sun is low and the light is warm, soft, and directional. Shadows are long, textures are emphasized, and colors glow. This is the most forgiving light for taking photos of landscapes, and as a beginner, it's the best time to learn.
Blue hour is the period before sunrise and after sunset when the sky turns deep blue and the ambient light is soft and even. It's cooler and quieter than golden hour. Both windows offer far superior light to midday — and this is when most photographers shoot their best landscape photos.
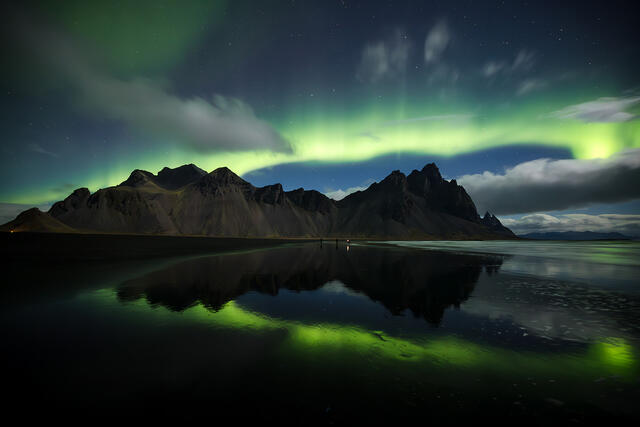
For night sky and aurora work, the windows extend even further — my guide to photographing the northern lights covers exposure settings, location planning, and timing for shooting auroras.
Get in the habit of shooting during these windows. It means early mornings and late evenings, which takes commitment. But the difference in your landscape photographs will be immediate and obvious.
Why Midday Light Is the Hardest to Work With
When the sun is directly overhead, the light coming down is harsh and flat. Shadows are short and unflattering. Contrast is extreme — the brightest area of the sky blows out while shadows go black. The dynamic range of the scene exceeds what most cameras can capture in a single frame.
That doesn't mean midday is useless. Overcast midday works well for forests, waterfalls, and intimate landscape details where you want even, diffused light. But for wide, open scenes, midday sun will fight you. Wait for a better moment.
How Weather Changes Everything
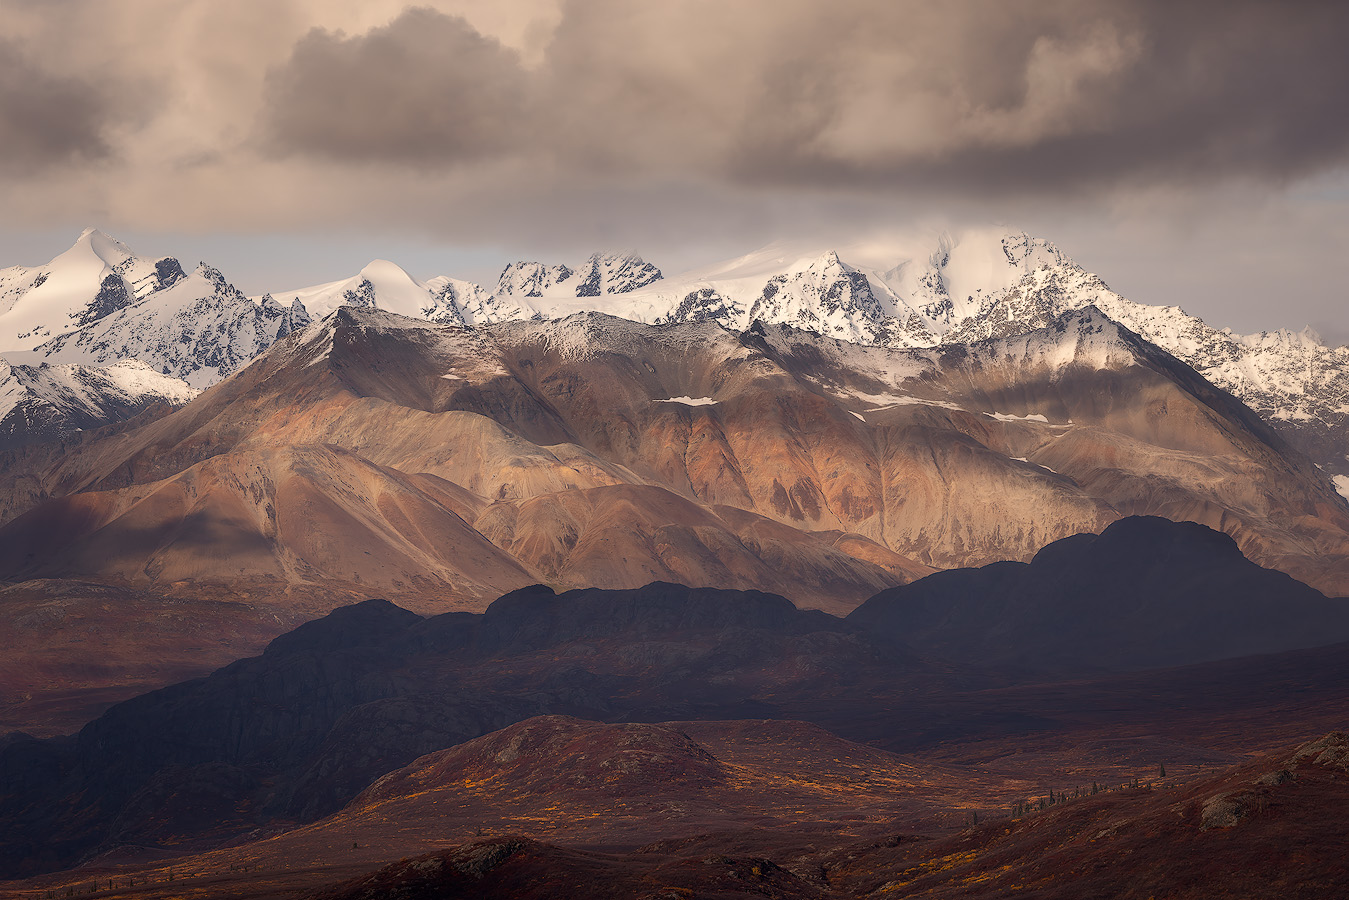
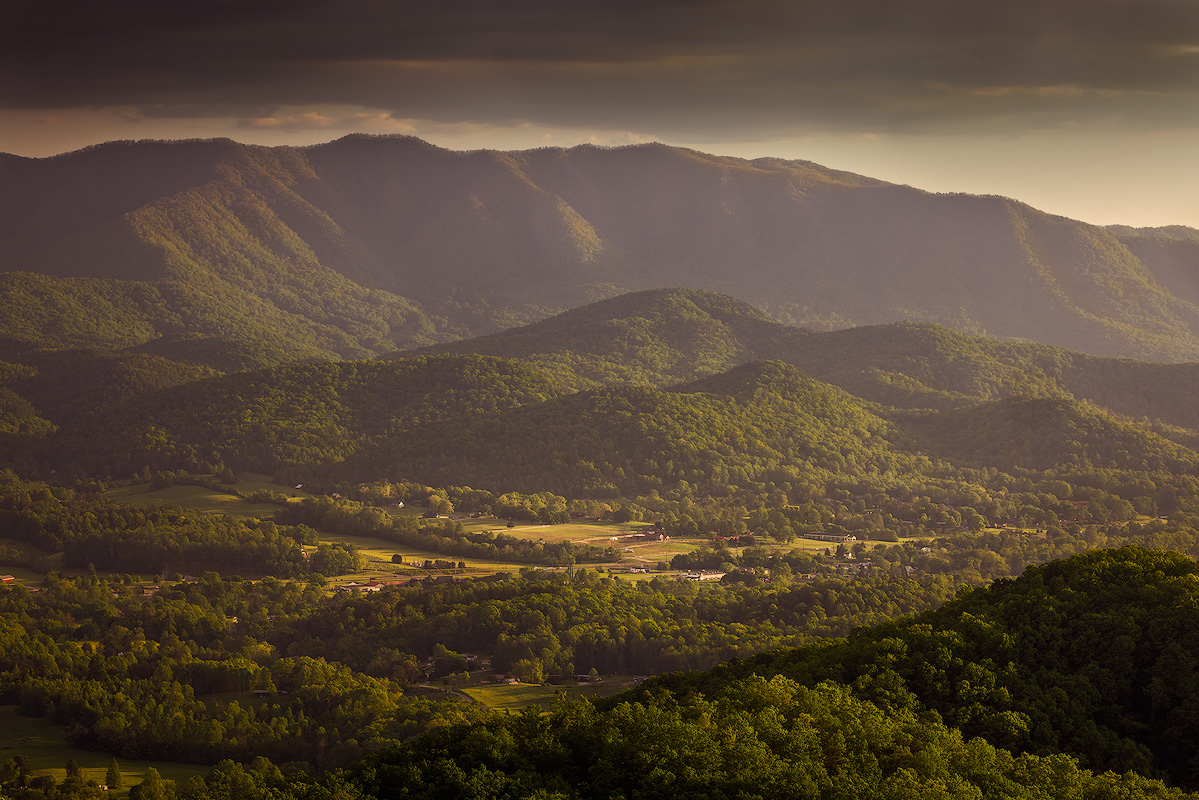
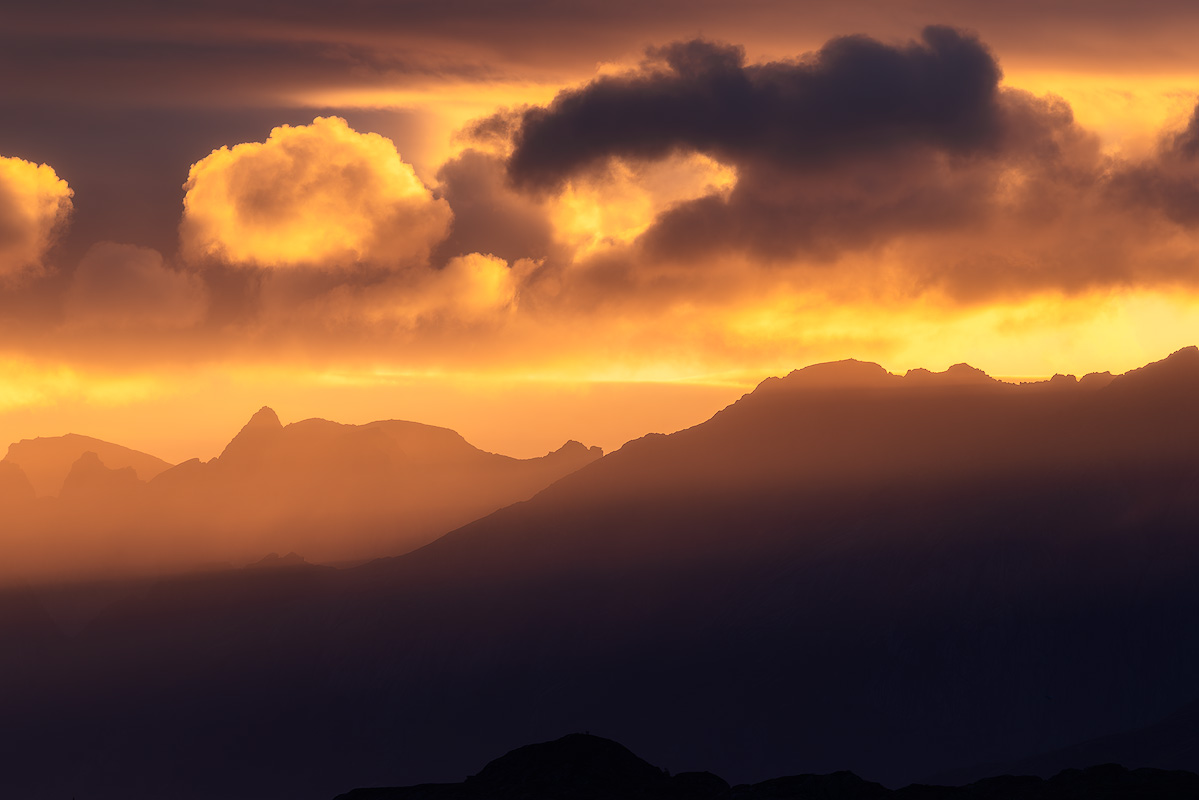
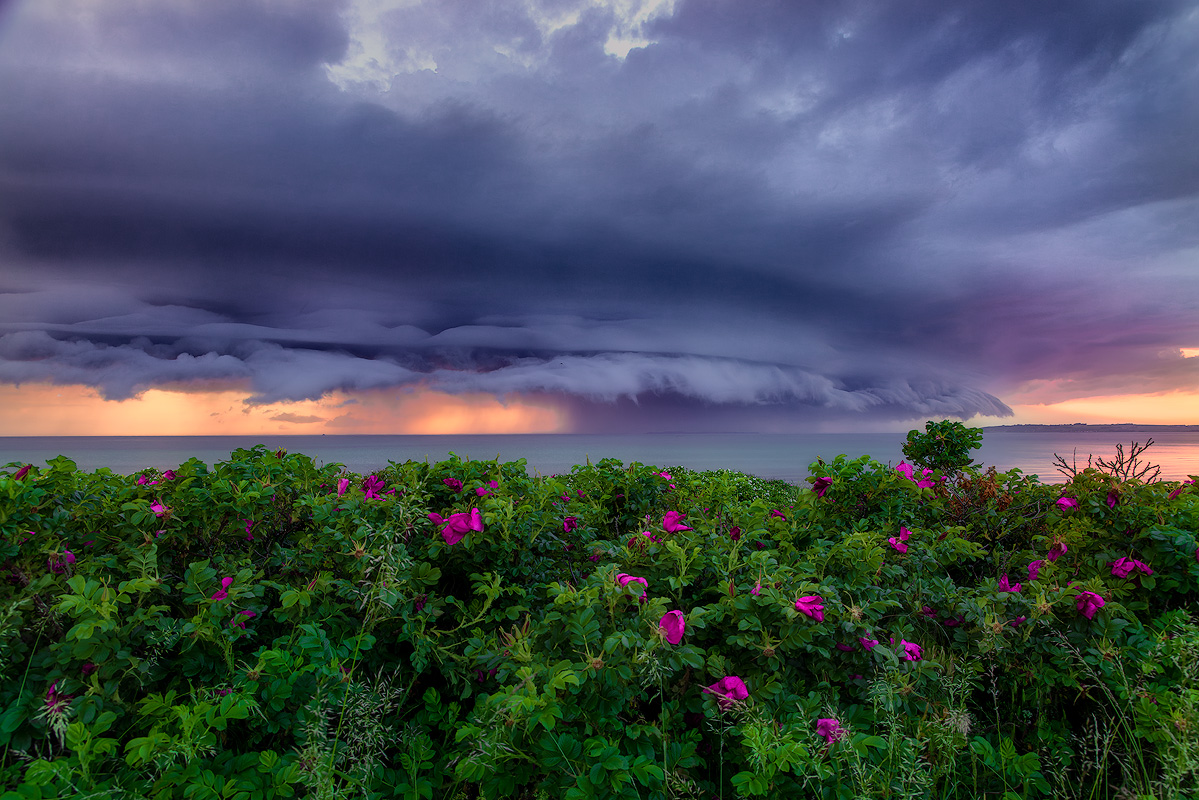
Weather is not an obstacle to landscape photography. It's a collaborator. Fog, storm clouds, rain, snow, wind — these conditions create mood, drama, and atmosphere that clear skies never will.
Some of the most compelling landscape images I've made came from weather that most photographers would call "bad." Fog rolling through river valleys at dawn. Snow squalls breaking just enough to reveal a mountain. Storm light — that electric glow that cuts through a gap in dark clouds from a perfect angle — is some of the most dramatic light in nature.
Don't cancel a shoot because of weather. Dress for it and go.
Filters and Long Exposure for Landscape Photographers
Once you're comfortable with the basics, two tools will open up new creative possibilities for shooting landscapes: ND filters and long exposure techniques.
ND Filters — Controlling Light for Creative Effects
A neutral density filter (or ND filter) is essentially sunglasses for your lens. It reduces the amount of light entering the camera without changing colors, allowing you to use slow shutter speeds even in daylight. A 6-stop or 10-stop ND filter lets you shoot long exposures of 10, 30, or even 60 seconds in the middle of the day.
A graduated filter (or graduated ND filter) is darker on top and clear on the bottom — it balances the exposure between a bright sky and a darker foreground. This is especially useful at golden hour when the sky is several stops brighter than the landscape below.
Start with a standard ND filter and add a graduated filter as you grow. Combined with a polarizing filter, these three cover the vast majority of situations landscape photographers encounter in the field.
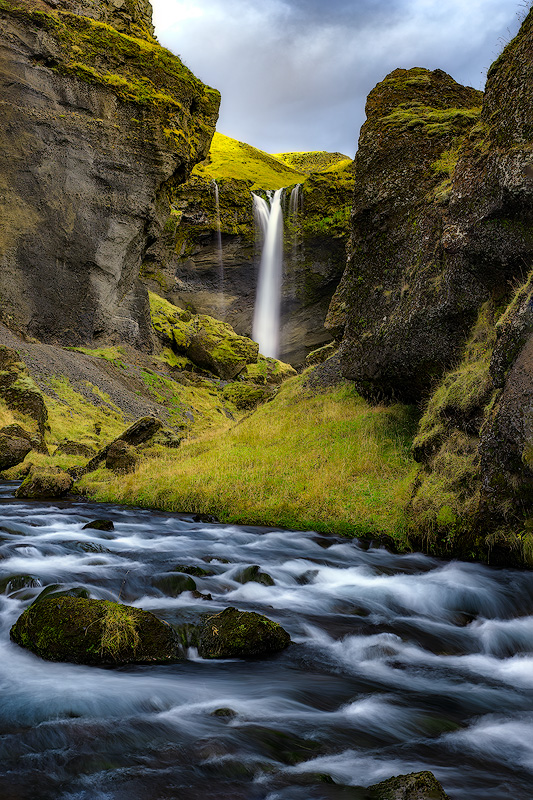
Long Exposure Basics — Adding Drama to Your Landscape Photos
Long exposure photography transforms moving elements into something ethereal. Water becomes silk. Clouds streak across the sky. Waves pull back from rocks leaving foam trails that exist for seconds before vanishing.
To shoot a long exposure, you need a tripod, a remote control or shutter release button, and either low light or an ND filter. Set your camera to manual mode, dial your aperture to f/8–f/11, keep ISO at 100, and let the shutter speed stretch to whatever the scene requires — 1 second for moving water, 15–30 seconds for silky smooth effects.
The results can be dramatic. Some of my favorite landscape photographs — from Caddo Lake in Texas to the beaches of Lofoten — came from long exposure work. It's a technique that rewards patience and changes how you see motion in a scene.

Finding Locations Without Traveling Far
You don't need to fly to Iceland or Patagonia to practice landscape photography. Some of the most important learning happens close to home, in places you can return to repeatedly. Even shooting landscapes in local national parks or along nearby rivers teaches you more than a one-time visit to a famous location.
Scouting Your Own Backyard
Every region has photogenic landscapes. City parks, local rivers, nearby hills, agricultural land, coastline — you just need to look at your surroundings with a photographer's eye. What's interesting about the light here? Where does fog gather? What happens to this field at sunrise?
I'm based in Fairbanks, Alaska, so I have access to dramatic terrain. But I've also made photos I love within a 15-minute drive from my house — the Chena River, roadside frost formations, birch forest with trees glowing in autumn light. Proximity gives you the ability to return, and returning teaches you more than chasing new spots.
Using Google Earth and Weather Apps to Plan Ahead
Google Earth is a powerful scouting tool. You can explore terrain, study elevation, identify potential compositions, and plan vantage points before you ever set foot on location. PhotoPills and The Photographer's Ephemeris show you exactly where the sun and moon will be at any time from any location — this kind of planning is what separates learning composition from guessing at it.
For weather, Windy and Mountain Forecast give detailed, location-specific forecasts that are more useful than generic weather apps. Knowing that fog is predicted for a river valley at dawn — that's actionable intelligence for a landscape photographer.
The Value of Returning to the Same Location
Face The Outdoors Photography recommends that beginners resist the urge to constantly chase new locations. Instead, pick one or two spots within easy reach and photograph them across seasons, weather, and times of day. Many photographers underestimate how much the same location changes.
This is how you develop your eye. You learn how light behaves in a specific place. You discover compositions you missed the first time. You start to see subtle changes — how autumn colors shift week by week, how ice forms differently each morning, how a storm transforms a familiar scene into something unrecognizable.
Depth beats breadth. Especially when you're learning.
Your First Edit — Keeping It Natural
Once you've captured your images, editing is where you refine them. And for beginners, the most important thing I can say about editing is this: less is more.
Basic Adjustments in Lightroom or Free Alternatives
Adobe Lightroom is the industry standard for landscape photography editing. But if you're not ready to commit to a subscription, free alternatives like Darktable or RawTherapee handle RAW files well and follow similar principles.
Start with the basics: white balance to set the color temperature, exposure to get the overall brightness right, highlights and shadows to recover more detail at the extremes, and a touch of clarity or contrast to add definition. Those five adjustments will handle 80% of what you need to make your landscape photos look polished and natural.
As you progress, Lightroom's local adjustment brushes let you selectively brighten, darken, or sharpen specific areas — useful for drawing attention toward your subject without affecting the entire image. For a deeper look at landscape photography post-processing and how RAW image data actually works in editing, see my full guide.
One step beginners overlook: calibrate your monitor so the colors on screen are accurate. Without calibration, your edits may look completely different on other displays or in print.
The Temptation to Over-Edit (and How to Resist It)
Every new photographer goes through an over-editing phase. I did. You push the saturation slider until the greens are neon. You crank the clarity until everything looks crunchy. You boost the HDR effect until the image shows something that never existed in the real world.
It's part of the process. But the sooner you pull back, the better. Ask yourself: does this look like what I saw? Or does it look like what I think will get likes on social media? Those are different questions. The first one leads to authentic work. The second one leads to work that ages badly.
My editing philosophy — and it's one I teach in every workshop — is that if it was in the scene, I'll enhance it. If it wasn't, I won't add it. That simple rule has kept my work honest.
Remember that good editing starts with good capture. Adjusting contrast, saturation, and exposure in post-processing can recover dynamic range from a RAW file — but a sharp, well-exposed original shot from a tripod gives you far more to work with than a noisy handheld frame.
The Beginner Mistakes I Made (So You Don't Have To)
I'm sharing these because I made all of them and I don't want you to waste the time I did figuring them out years ago.
I shot everything at eye level. For years. It never occurred to me to get low, get high, or move my feet. The moment I started crouching down and using wide angle foreground elements, my compositions improved overnight.
I only shot during perfect conditions. If it was cloudy, I stayed home. If it was raining, I stayed home. I missed hundreds of opportunities for dramatic landscape images because I was waiting for bluebird skies. Moody weather makes moody photographs, and moody photographs are the ones people remember.
I carried too much gear. I bought every lens and filter I could afford and hiked with a 40-pound pack. I spent more time deciding which lens to use than actually taking photos. Now I regularly go out with one body and one wide angle lens. Constraints breed creativity.
I never revisited locations. I treated photography like a checklist — shoot a place once, move on. I didn't understand that the same location in different conditions is a completely different photograph. Returning is where the real growth happens.
I compared my work to professional photographers with decades of experience. And it paralyzed me. Comparison is useful for identifying what you want to learn, but toxic when it makes you feel like your work isn't worth pursuing. Every landscape photographer you admire started with terrible images. Every single one.
What Happens After Your First Good Shot
There's a moment — and it might come after weeks or months of shooting landscapes — when you pull an image up on your computer and something shifts. It's not perfect. You can see things you'd change. But it works. It captures something real. And you feel it.
That moment is the beginning. Not because you've arrived, but because you now know what's possible. You've proven to yourself that you can see a landscape, translate it through your camera, and create something that holds meaning. You might want to learn how to improve your landscape photography with advanced editing techniques to pull more detail from your RAW files.
From there, the path branches. You might want to explore long exposure work — waterfalls, night skies, aurora. You might want to learn advanced editing techniques to pull more detail from your RAW files. You might want to travel to locations you've only seen in photographs and discover what they look like through your own lens. These are the moments that keep landscape photographers coming back, shoot after shoot, season after season.
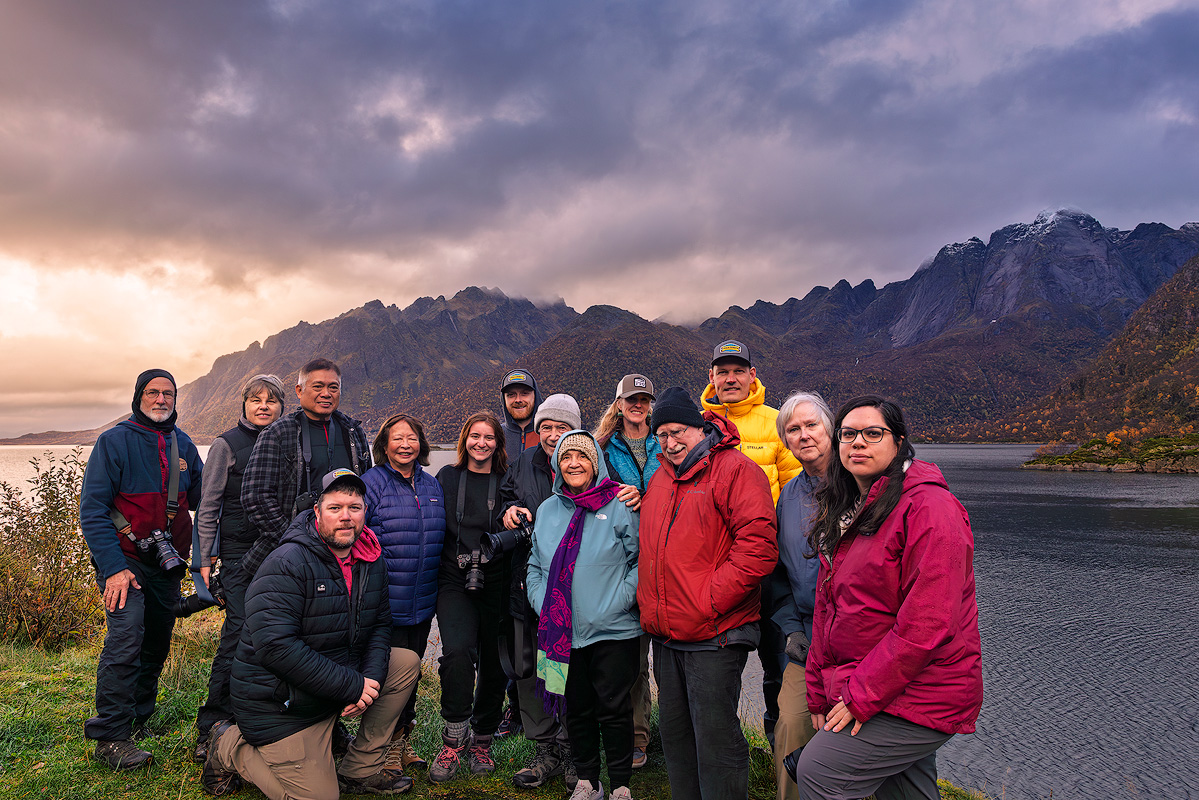
And if you ever want to learn this stuff in the field — standing next to someone who's been doing it for 20+ years and can show you in real time — that's what my workshops are about. Small groups, real locations, no pressure. Just photography.
FAQ — Beginner Landscape Photography Questions
What is the best beginner camera for landscape photography?
Any camera with manual exposure controls and RAW capability will work for learning landscape photography. Entry-level mirrorless cameras and DSLR cameras from Sony, Canon, Nikon, or Fujifilm are all excellent choices. Don't overthink the camera body — invest in a solid tripod and one versatile wide angle lens (a 24-70mm or 18-55mm kit lens is a great starting point). You can upgrade gear as your skills develop and you understand what you actually need.
Do I need ND filters for landscape photography?
A circular polarizing filter is the most useful filter for beginners — it cuts glare, deepens skies, and saturates colors in ways that can't be replicated in editing. An ND filter becomes important when you want to shoot long exposures in daylight — it's what lets you get those silky waterfall and smooth ocean shots. Start with a polarizer and add an ND filter as you grow into long exposure work.
How do I photograph moving water?
Use a tripod and slow shutter speeds. Start at 1/4 second and experiment with slower speeds — 1 second for smooth water, 5–15 seconds for the silky, dreamlike effect. An ND filter allows long exposures in brighter conditions. Keep your ISO low and use a small aperture between f/8 and f/14 for the best balance of depth of field and image quality.
What's the best focal length for shooting landscapes?
There's no single answer. Wide angle lenses (16–35mm) are the most common choice because they capture sweeping views and emphasize foreground elements. But telephoto lenses (70–200mm) are equally valuable for isolating details and compressing layers. A versatile zoom like a 24–105mm covers both ends well and is a strong first lens for landscape photography. Many landscape photographers carry both a wide angle and a telephoto to cover different exposures and compositions.
How do I take sharp landscape photos?
Use a tripod. Shoot at f/8 to f/11 for optimal lens sharpness. Use a remote shutter release or your camera's self-timer to avoid camera shake. Keep ISO low. Turn off image stabilization when your camera is on a tripod (stabilization can actually introduce micro-vibrations on a stable platform). Focus one-third into the scene for maximum depth of field, or use manual focus and live view to place focus precisely where you want a sharp image.
Should I shoot in manual mode as a beginner?
Not necessarily right away. Aperture priority mode is a great stepping stone — you set the aperture (which controls depth of field) and the camera calculates the shutter speed. This lets you focus on learning composition and aperture choices while the camera handles finding the correct exposure. As you get comfortable reading the light and understanding the exposure triangle, transition to full manual mode for complete creative control over your landscape photos.