Shutter Speed: Capturing Motion in Landscape Photography
I've been shooting landscapes for over twenty years, and shutter speed is still the setting I think about most when I'm standing in front of a scene. Not aperture, not ISO — shutter speed. Because this is the setting that decides how time itself appears in your photograph. It's how you choose whether crashing waves look violent or peaceful, whether clouds feel frozen or streaked across the sky, whether moving water looks chaotic or calm.
Understanding shutter speed in landscape photography isn't complicated. But learning to use it intentionally — that's where the creative work lives.
This guide breaks down how it works, when to go fast, when to go slow, and how to start making deliberate choices in the field instead of letting your camera decide for you. If you're just getting started with camera settings, my landscape photography for beginners guide covers the fundamentals before you dive into shutter speed technique. Whether you're freezing crashing waves or creating silky waterfalls, mastering shutter speed to capture the right creative effect transforms how you see and photograph the natural world.
What Is Shutter Speed and How Does It Work?
Shutter speed is the length of time your camera's shutter is open, exposing the camera sensor to available light. It's measured in seconds or fractions of a second — 1/1000s, 1/250s, 1/60s, 1 second, 5 seconds, 30 seconds.
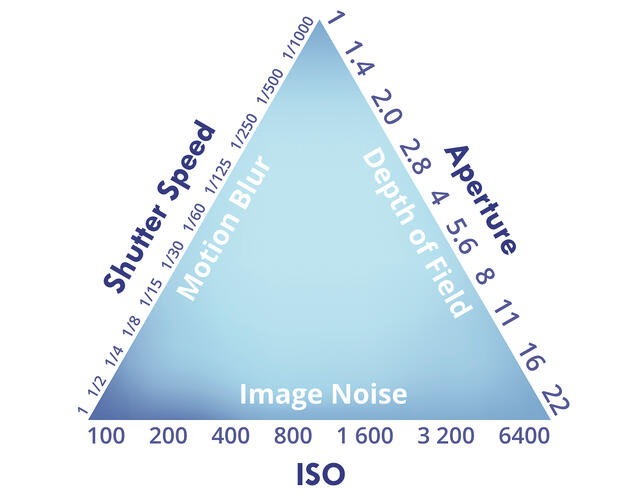
Together with aperture and ISO, shutter speed forms the exposure triangle — the three settings that control how much light reaches your sensor. The length of your shutter speed shifts the brightness of your image — the longer the shutter is open, the more light data the sensor collects. A faster speed lets in less light. A slower speed lets in more light. Adjusting one means compensating with the others to maintain a proper exposure.
But shutter speed does more than manage brightness. It controls how motion is recorded.
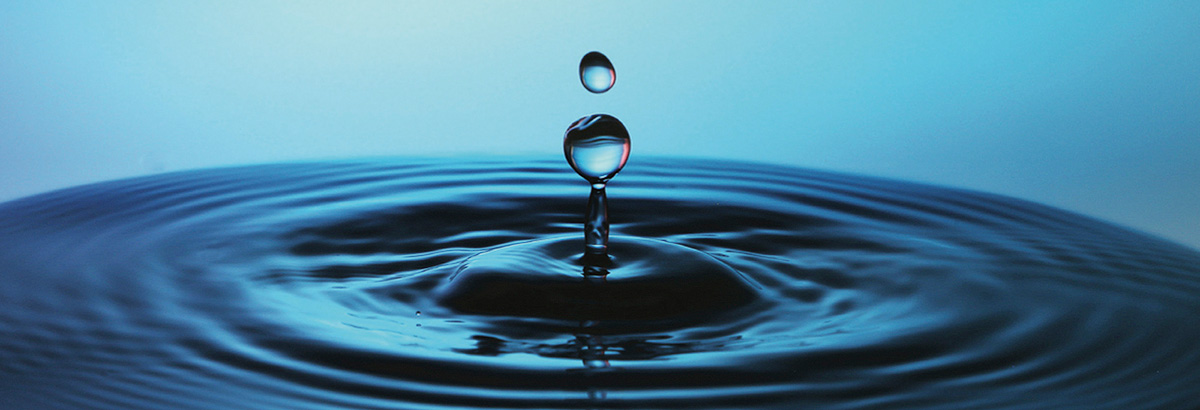
A fast shutter speed opens and closes in a fraction of a second, freezing everything in the frame. A very slow shutter speed keeps the shutter open for longer, allowing anything that moves — water, clouds, grass, fog — to blur across the frame. Most cameras display shutter speed clearly on the screen or in the viewfinder, making it easy to adjust in real time.
That distinction is everything in landscape photography. The same waterfall photographed at 1/1000s and at 2 seconds produces two completely different landscape photographs. One is sharp and raw. The other is smooth and dreamlike. Neither is right or wrong — they tell different stories. Choosing which story to tell is your creative vision at work.
Freezing Motion: When to Use Fast Shutter Speeds
Fast shutter speeds — generally 1/250s and above — capture a single moment with complete clarity. A fast shutter speed is often the easiest choice for beginners because it doesn't require a tripod and the results are immediately sharp. Using fast shutter speeds allows you to capture moving subjects without motion blur — crashing waves, wildlife, wind-blown elements all stay crisp and detailed.
In landscape photography, freezing motion matters more than most photographers realize. It's not just for sports or wildlife — it's for any scene where the energy of a single instant tells the story better than blurred motion would.
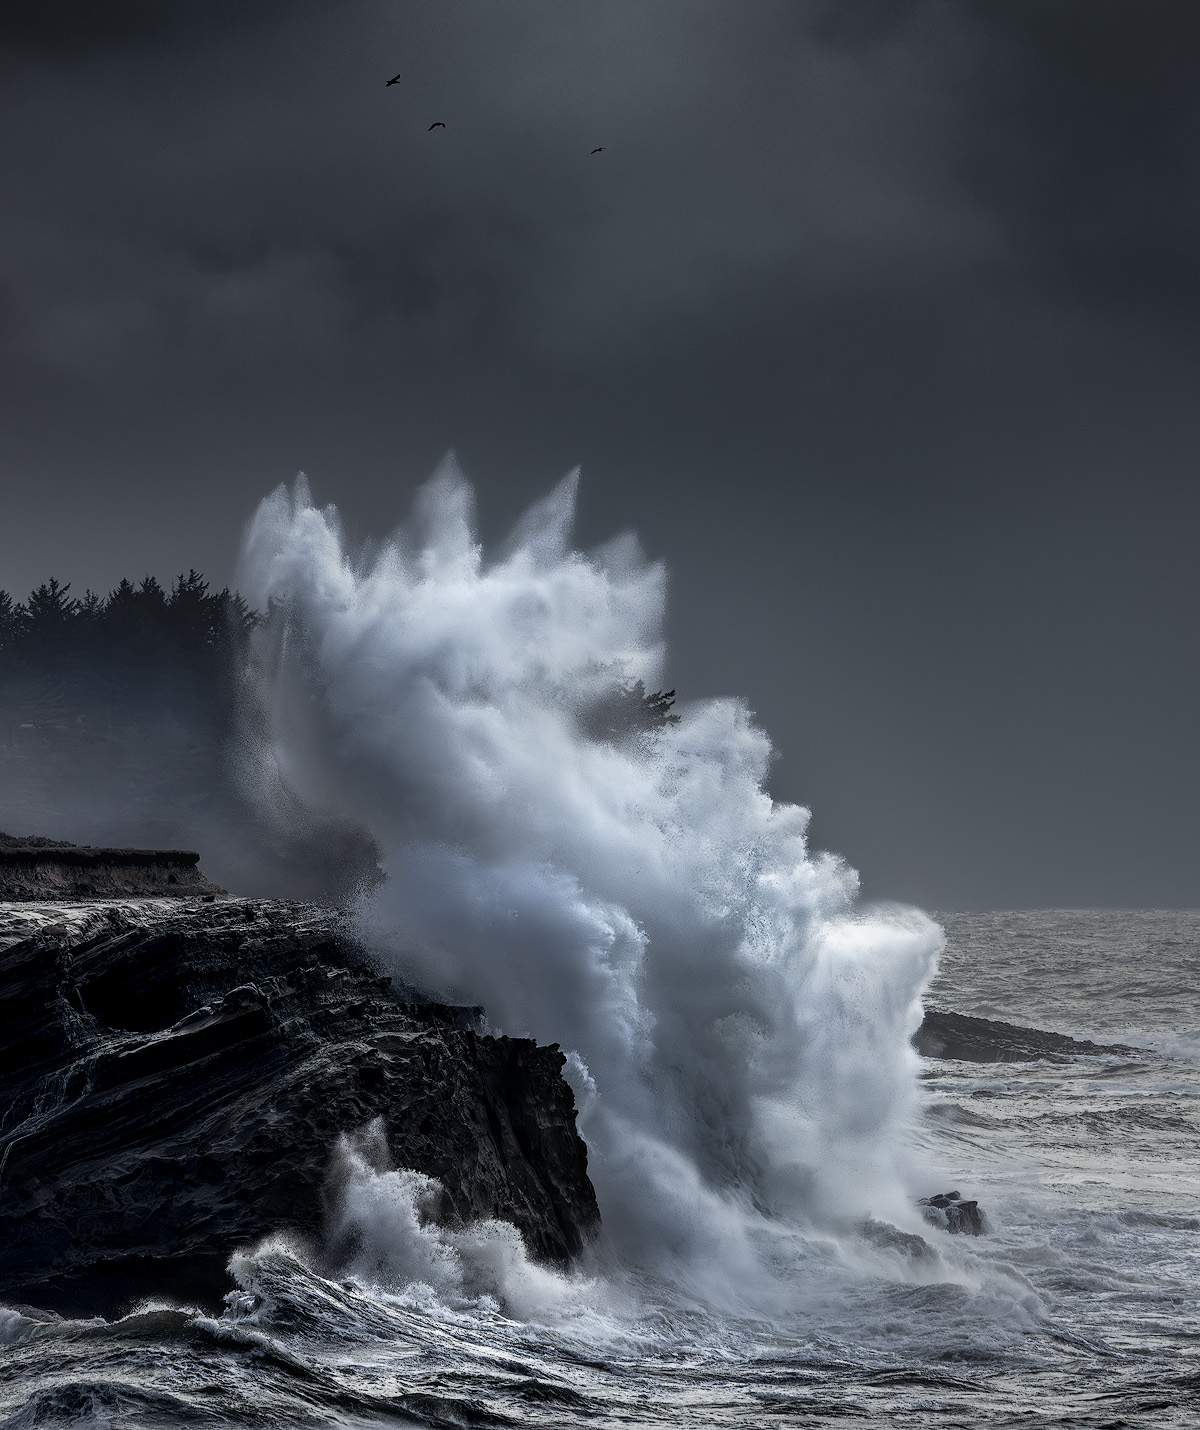
Crashing Waves and Coastal Drama
When I'm on a coast with heavy surf, I often start at 1/500s or faster. At those speeds, individual droplets of spray freeze in mid-air. The texture of a breaking wave — all that chaotic energy — gets locked into a single frame. You see details your eye can't process in real time.
That frozen chaos tells a story of power that a long exposure simply can't convey. The key is timing. Waves have rhythm. Watch the sets, anticipate the peak moment, and fire the shutter when the energy is at its highest. Fast shutter speeds let you capture the details of splashing waves and the texture of flowing water without any blur. When shooting from a moving platform, such as a boat, a fast shutter speed is also essential to prevent blur from camera movement.
Wind, Weather, and Wildlife
On windy days, fast shutter speeds keep foreground elements sharp. Blowing grasses, trembling wildflowers, fluttering leaves — these turn into distracting blurs if you're not careful. When I want the landscape sharp and still, I'll push to 1/250s or higher and adjust my ISO upward if needed.
Fast shutter speeds are also essential when photographing wildlife in a landscape context. A bear walking along a shoreline, birds in flight against a mountain backdrop — these moments demand 1/500s at minimum, often 1/1000s or faster. For bear-specific settings, lens choices, and the behavioral context behind the exposure decisions, see my guide to brown bear encounters at Lake Clark. The focal length of your lens matters here too — a longer focal length requires an even faster speed to avoid camera shake when shooting handheld.
Most landscape photographers follow a general rule: use a shutter speed of at least 1/(2x focal length) when handholding. So a 200mm lens needs at least 1/400s. This helps ensure the entire image stays sharp even without a tripod.
When Freezing Motion Serves the Story
Here's the question I ask myself: what do I want the viewer to feel? If the answer involves energy, power, tension, or raw force — a fast shutter speed serves that story. The frozen moment says "look at this instant" rather than "feel the passage of time."
Not every scene calls for blur. Sometimes the most honest representation of a place is a sharp, frozen frame that captures exactly what was happening in that single second.
Creating Motion Blur: When to Use Slow Shutter Speeds
This is the technique that draws most landscape photographers to shutter speed as a creative tool. Long shutter speeds — from 1/4 second to 30 seconds or longer — transform moving elements into smooth, flowing textures. This is long exposure photography at its core.
Water becomes silk. Slow moving clouds streak across the sky. Fog drifts through a frame like breath. The photograph stops recording a moment and starts recording the passage of time.
Silky Water — Rivers, Waterfalls, and Ocean
Moving water is the most common subject for slow exposure work, and for good reason. The creative effect is dramatic.
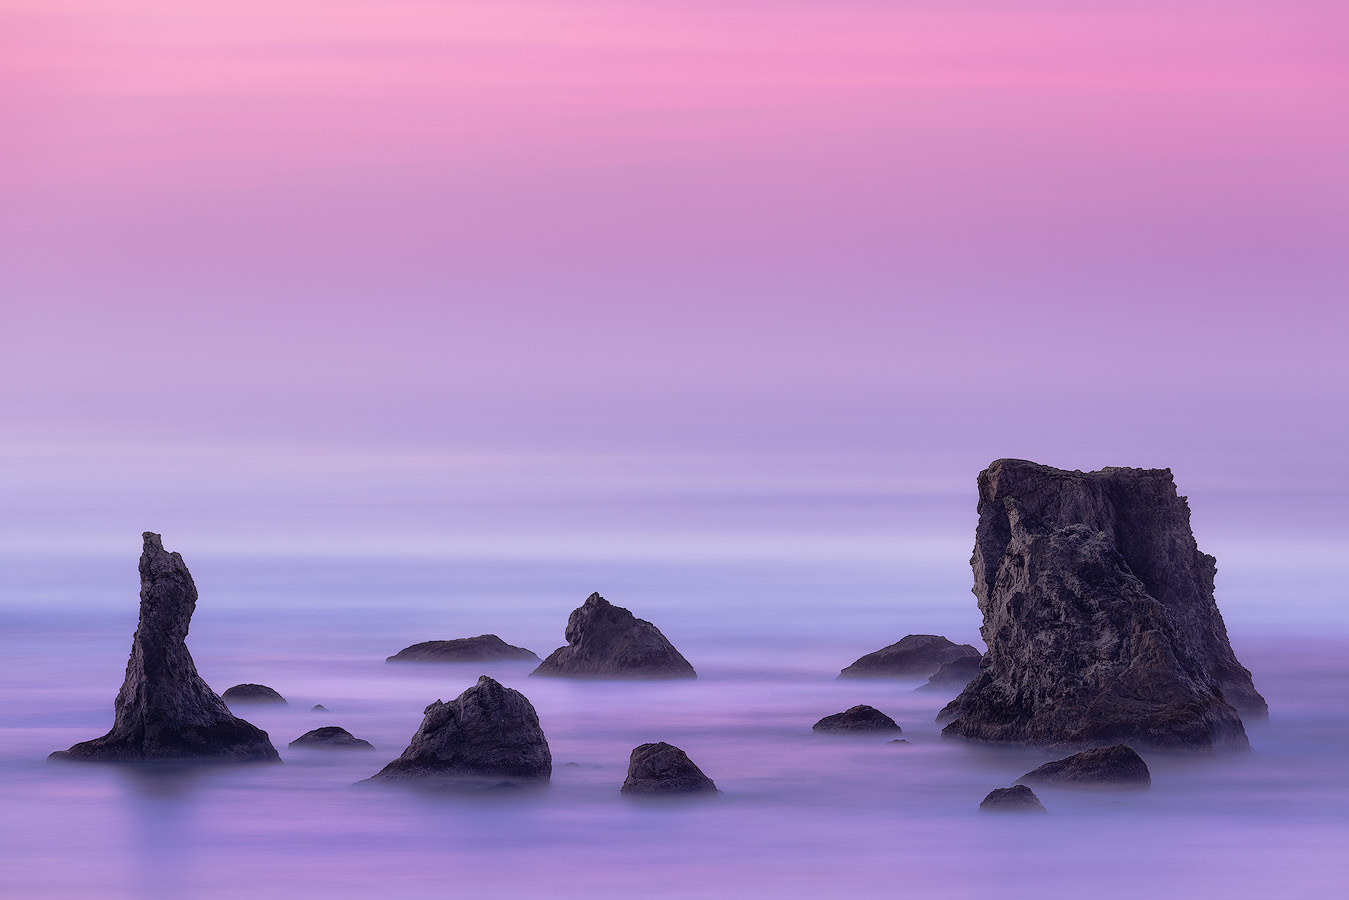
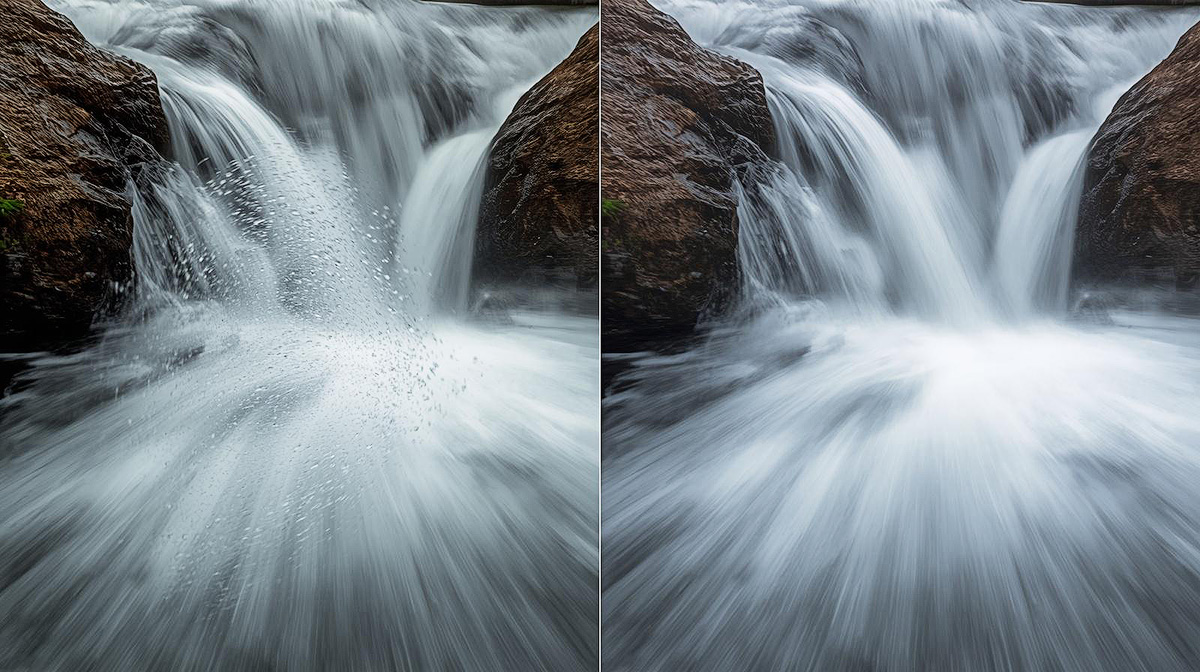
At 1/4 second, water starts to soften but you still maintain texture and form. At 1 to 2 seconds, it smooths into flowing ribbons. At 5 to 15 seconds, it becomes completely silky — almost fog-like. At 30 seconds or beyond, churning ocean transforms into a flat, misty surface that makes rocks look like they're floating. The result is a calm, glassy, distraction-free appearance that transforms chaotic water into something serene.
I usually start around 1/2 second and work slower, checking each frame. There's no single correct exposure time — it depends on how fast the water is moving and what mood you want. Shoot the same scene at varying shutter speeds and compare. That's how you develop your eye.
A shutter speed of 1 second is often the sweet spot for waterfalls — it smooths the flow without erasing all the water's natural energy. But every waterfall is different, and the best approach is to experiment with different shutter speeds until the image matches your creative vision.
Streaking Clouds and Night Sky
Clouds move slower than water, so you need longer exposures — typically 15 seconds to several minutes. At those durations, clouds stretch into directional streaks that add drama to a sky that might otherwise look static.
For night sky work and night photography, exposures of 15 to 30 seconds capture the deep blues of twilight, and longer exposures produce light trails from stars as the earth rotates. These techniques open up an entirely different creative effect — the kind of image that feels like it exists outside normal time.

This is where an ND filter becomes essential. In bright sunlight, you can't expose for 30 seconds without overexposing the image. A neutral density filter cuts the light entering your wide angle lens without changing colors, allowing long exposure photography even in daylight. It's like sunglasses for your camera.
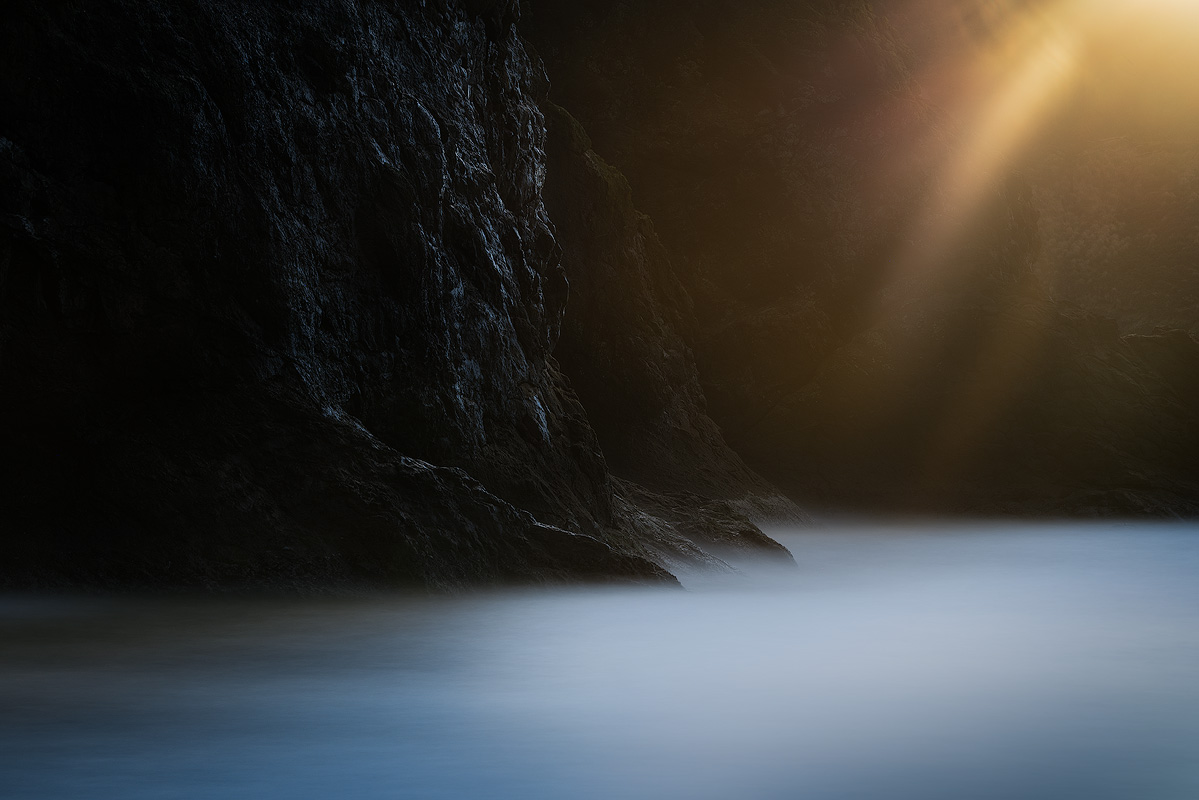
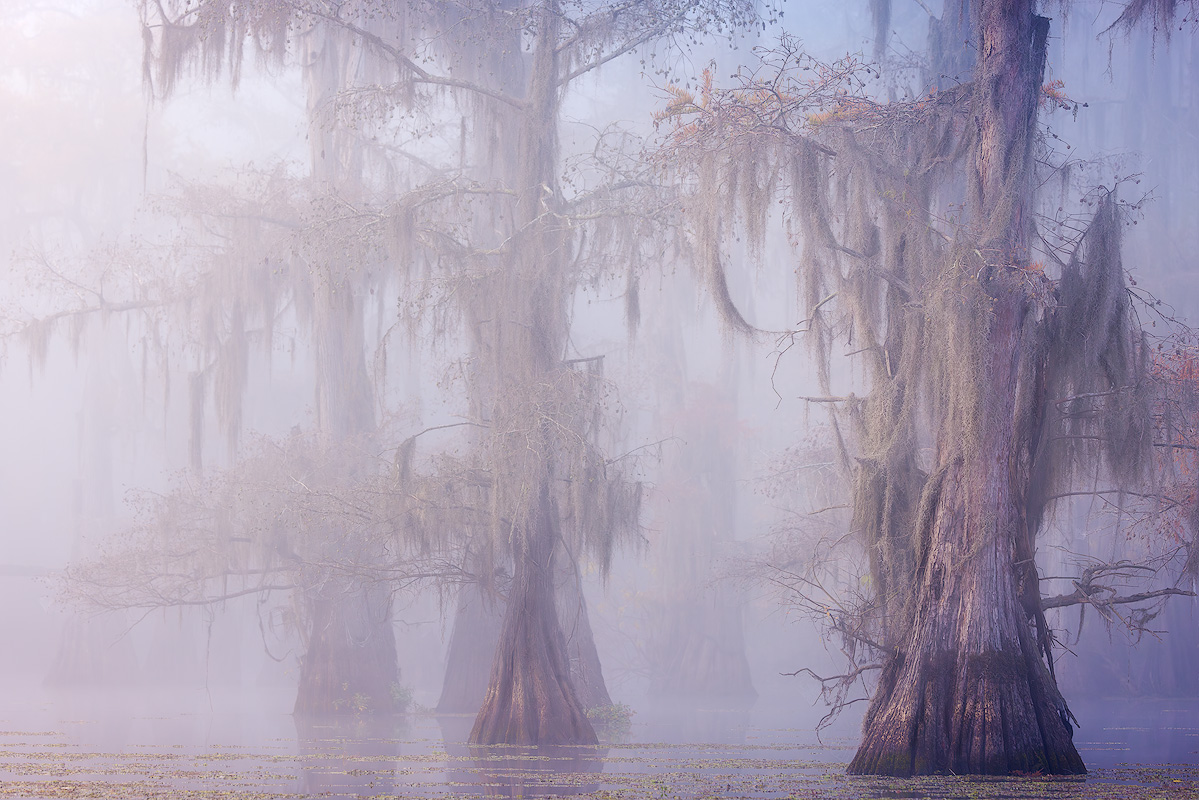
Fog, Mist, and Dramatic Light
Some of my favorite long exposure work involves fog. A 5- to 15-second exposure smooths fog into soft, luminous shapes that feel almost otherworldly.
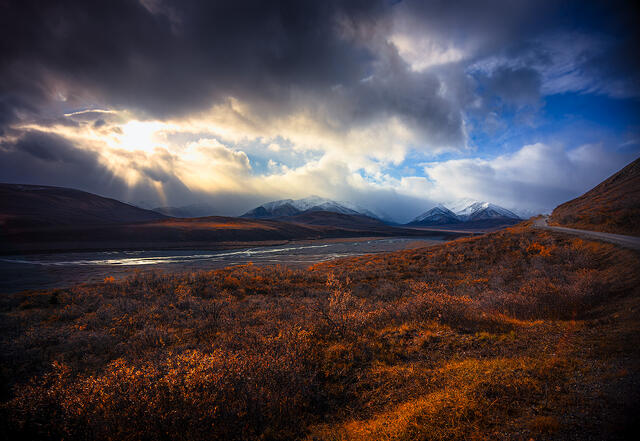
River valleys at dawn during blue hour, coastal headlands as marine fog rolls in — these are scenes where a slow exposure reveals something invisible to the naked eye. On an overcast day, reflected light from clouds creates an even, diffused glow that long exposures turn into something magical.
The emotional quality is different from frozen shots. Where a fast speed captures intensity, a slow speed captures calm, mystery, or the passage of time. Both are honest representations of the landscape — they just emphasize different truths.
Choosing the Right Shutter Speed for Your Scene
There's no universal formula. The right speed is the one that communicates what you felt standing in front of the scene. There's not a single correct shutter speed for any landscape scene — and the difference between what a slow and fast speed produces is much bigger than most photographers expect until they see it for themselves. But here are the starting points I use after twenty years of shooting landscapes.
Shutter Speed Reference Guide
Freezing motion (1/500s+): Crashing waves, wildlife, wind-blown elements. Sharp detail, raw energy.
Slight blur (1/15s–1/4s): Water softens but retains texture. Gentle movement without going fully silky.
Smooth water (1/2s–2s): Ribbons and flowing shapes. The most common range for waterfall and river scenes.
Silky water (5–15s): Dreamlike surface. Everything in motion blurs completely while still elements stay sharp.
Ethereal (30s+): Ocean becomes mist, clouds streak dramatically. Requires an ND filter in anything but very low light.
These are starting points, not rules. The speed of the water, the direction of the wind, the same distance to the subject, and the quality of light all affect how a given shutter speed renders.
Face The Outdoors Photography teaches these principles in the field because seeing the results in real time — comparing a 1-second exposure to a 15-second exposure of the same scene — is worth more than any chart.
Essential Gear for Controlling Shutter Speed
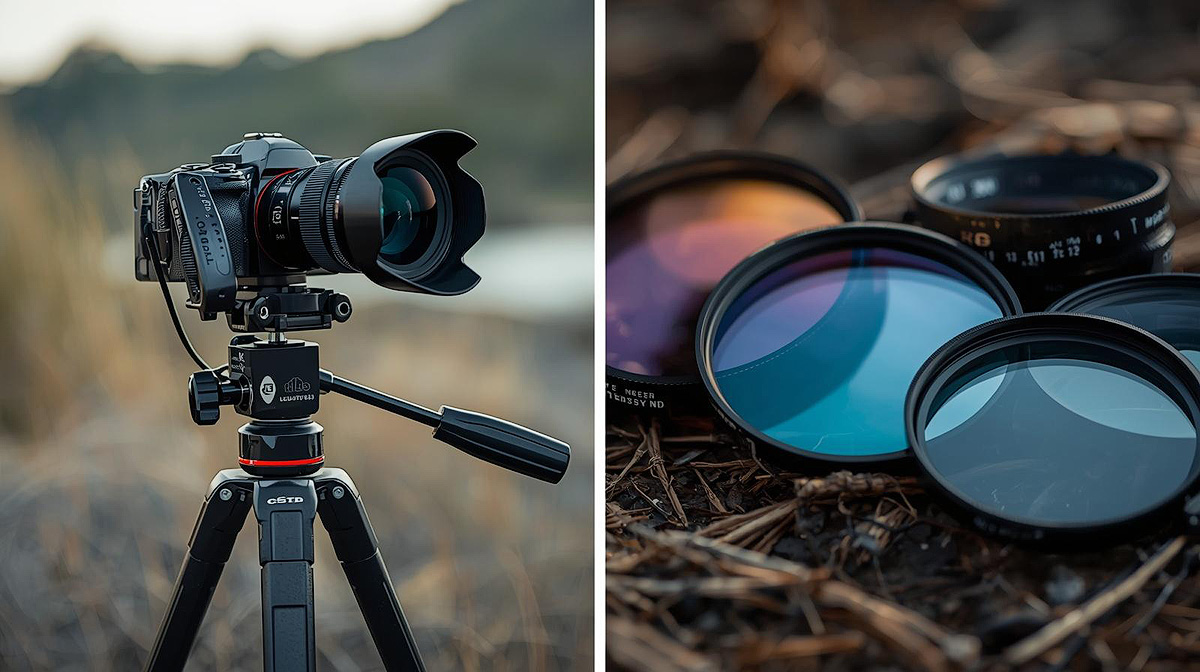
Tripod — The Non-Negotiable
Any exposure longer than about 1/60 second will show camera shake if you're handholding. That means most of the slow work that makes landscape photography compelling requires a sturdy tripod. One that doesn't vibrate in wind and can hold your camera steady during a 30-second exposure.
Use manual focus when your camera is on a tripod for precise control — autofocus can hunt in low light and shift between frames. A tripod also forces you to slow down and compose deliberately, which leads to better photographs regardless of shutter speed.
Remote Shutter Release
Even pressing the shutter button introduces vibration. A basic wired remote costs under $20 and eliminates the risk. Your camera's 2-second self-timer works as a backup, but a dedicated remote gives you more control for bulb mode exposures longer than 30 seconds.
ND Filters — Extending Your Creative Range
A neutral density filter makes long exposure photography possible in daylight. Without one, a single exposure at a slow speed would completely overexpose the image.
I carry a 6-stop and a 10-stop ND filter. The 6-stop turns a 1/30s exposure into a 2-second exposure. The 10-stop turns it into a 30-second exposure. Most cameras pair well with either strength — the choice depends on how much you want to slow things down.
Combined with a circular polarizing filter, these cover almost every situation most landscape photographers encounter. A graduated ND filter balances bright skies against darker foregrounds — especially useful at golden hour when the dynamic range of the scene exceeds what the camera sensor can capture in a single exposure.
Shutter Speed and the Exposure Triangle
Every time you change your shutter speed, it affects exposure. Slowing down lets in more light. Speeding up lets in less light. You compensate with either a wider aperture (letting in more light) or by adjusting ISO.
For landscape photography, the typical workflow is: set aperture to f/8–f/11 for maximum depth of field. Set ISO to 100. Let shutter speed fall wherever it needs to for the right exposure. On a tripod, a slow speed isn't a problem — it's an opportunity.
For a deeper look at why f/8 to f/11 is the sweet spot and when to deviate, see my guide to aperture and depth of field in landscape photography.
If you need a faster speed, raise high ISO only as necessary. Keeping ISO low preserves image quality and avoids noise. For a complete guide to ISO and image quality in landscape photography, including how to manage noise at higher sensitivities for handheld and wildlife shooting, see my ISO breakdown.
Aperture priority mode handles this automatically — you choose aperture, the camera picks the speed. This works well for general shooting.
But when motion IS the creative variable, switch to manual mode. Set everything yourself. Check the histogram. Some photographers also use shutter priority mode, where you set the speed and the camera picks the aperture — useful when the shutter speed to capture a specific motion effect is your primary concern.
Post processing can recover some exposure mistakes, but getting it right in camera saves time and preserves the full dynamic range of your RAW file. Modern cameras display the histogram in real time, making it easier to dial in the right exposure before pressing the shutter.
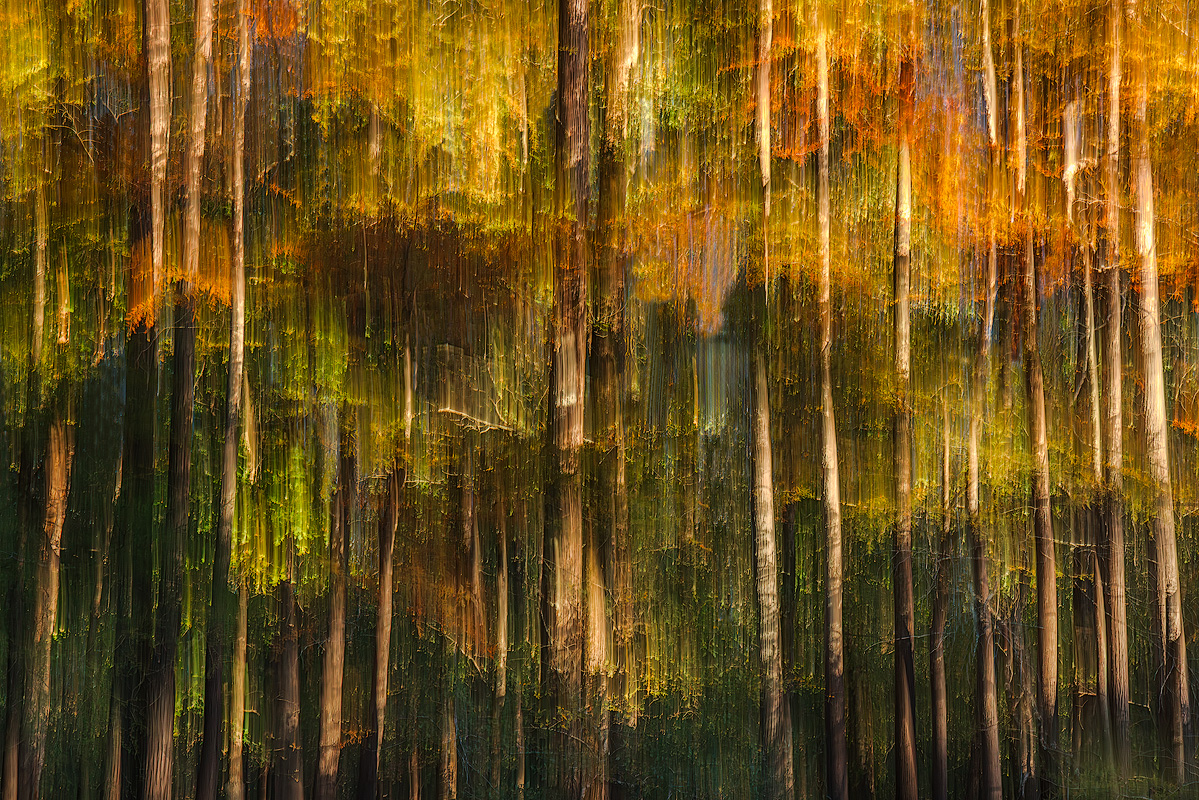
Intentional Camera Movement (ICM)
There's one more way to use slow speeds creatively: instead of keeping the camera still, you deliberately move it during the exposure.
ICM produces abstract, painterly images. Vertical panning through a forest creates streaked tree trunks. Horizontal sweeps across a sunset produce bands of warm color. It works best between 1/10s and 1 second with smooth, deliberate motion.
Most ICM frames won't work, but the ones that do can produce better photographs than you'd expect — and it develops your awareness of how exposure time interacts with movement. It's a technique that pushes creative boundaries beyond traditional tripod-based long exposure photography.
Field Exercise: Learning Through Comparison
Find a scene with moving water. Set your camera on a tripod in manual mode — f/11, ISO 100. Shoot the same composition at: 1/1000s, 1/250s, 1/60s, 1/4s, 1 second, 5 seconds, 15 seconds.
You'll need an ND filter for the slower speeds. When you review the sequence, you'll see the full progression from frozen chaos to liquid silk. That comparison teaches more about shutter speed in one session than months of reading.

Try it at different locations with varying shutter speeds — different water speeds, different weather. The more scenes you practice with, the faster you build instinct.
For even deeper learning, try the same exercise with clouds or grasses to see how exposure time affects different types of motion.
In some scenes, you may find that focus stacking — blending multiple exposures focused at different distances — helps maintain sharpness from foreground to background, especially at wider apertures used for low light.
Common Mistakes
Defaulting to one speed. A 1-second exposure that works on a gentle stream produces a completely different effect on crashing waves. Match the speed to the scene, not to your habit.
Ignoring camera shake. Handholding at 1/30s and wondering why images aren't sharp? Get on a tripod. Use a remote release. Eliminate vibration first.
Cranking the aperture past f/16. This introduces diffraction and softens the entire image. Use an ND filter instead of pushing to f/22 to achieve the same exposure with better image quality.
Not bracketing. Shoot the same scene at multiple different shutter speeds. Compare the results on a calibrated monitor. You'll often be surprised which one you prefer — and that surprise is how you learn to make better photographs.
What Happens After You Master Shutter Speed
Once you're comfortable controlling motion, something shifts in how you see the world. A river isn't just a river — it's a 1/4-second exposure or a 15-second exposure, and you can see both versions before you press the shutter. Wind isn't an annoyance — it's an opportunity.
That shift — from recording what's in front of you to interpreting it — is what separates taking photos from making landscape photographs. Shutter speed is one of the most powerful tools in landscape photography, and long exposure work creates a sense of atmosphere and movement that makes viewers feel as though they're standing right there with you.
If you want to practice these techniques in the field with hands-on guidance, that's what my workshops are about. Small groups, real conditions, no pressure.
FAQ — Shutter Speed in Landscape Photography
What shutter speed should I use for waterfalls?
Start at 1/2 second and experiment slower. At 1 to 2 seconds, water flows into smooth ribbons while rocks stay sharp. At 5 to 15 seconds, it becomes fully silky. The right speed depends on the water's velocity and the mood you want. Use a tripod, a remote release, and shoot multiple exposures to compare.
Can I use slow shutter speeds without a tripod?
Not effectively. Any exposure longer than 1/60 second shows camera shake when handholding. For the long shutter speeds that create motion blur — 1/4 second and slower — a sturdy tripod is essential. Image stabilization helps at moderate speeds but can't replace a tripod for true long exposure photography.
What ND filter strength do I need?
A 6-stop ND filter is a good starting point — it turns a 1/30s exposure into roughly a 2-second exposure. A 10-stop is more dramatic, enabling 30-second exposures in daylight. I carry both. If buying one to start, the 6-stop is more versatile for most landscape situations.
How do I avoid overexposure with slow shutter speeds?
Use a neutral density filter. Narrow your aperture to f/11 or f/14 but avoid going past f/16 due to diffraction. Keep ISO at 100. Check your histogram — highlights should not be clipped against the right edge. If the image is still too bright, you need a stronger ND filter.
What's the difference between shutter priority and manual mode?
Shutter priority mode lets you set the speed while the camera picks the aperture. Manual mode gives you control over both. For shooting landscapes where motion is the creative variable, manual mode is generally preferable — it lets you control depth of field and motion simultaneously. Use the histogram to verify your exposure.
How does shutter speed affect image sharpness?
Two ways. Slow speeds combined with camera shake produce blurry images — use a tripod below 1/60 second. And the choice between fast and slow determines whether moving elements appear sharp or blurred. Intentional blur is a legitimate creative choice that many nature photography professionals use to convey atmosphere and mood in their landscape photographs.