Signal to Noise Ratio Photography: The Foundation of Image Quality
Signal to noise ratio (SNR) photography describes the relationship between the real image signal your sensor records and the random noise layered on top of it. If you shoot landscapes, wildlife, or the night sky, a high SNR gives you a clean, sharp image with strong dynamic range, while a low SNR means grain, color noise, and lost fine detail. Higher SNR is always better, and most of it is won at capture, before any editing.
Digital noise is the unwelcome guest in an otherwise stunning photograph — grainy texture in low light, distracting colored blotches in smooth gradients. Understanding signal to noise ratio is what separates a noisy snapshot from a print-worthy image, because it tells you how much of your file is real detail and how much is random variation. This guide explains what noise is, what causes it, and how to protect image quality from the moment you press the shutter through your final edit.
What Is Digital Noise (Image Noise) in Photography?
Digital noise — also called image noise — is random variation in the brightness and color of individual pixels that doesn't belong to the scene you photographed. It arises when the camera sensor amplifies its signal, and it becomes prominent in low light or at high ISO settings, where the real image signal is weak relative to the noise floor.
Noise generally shows up in a few recognizable forms. Knowing which type you're looking at tells you how to treat it.
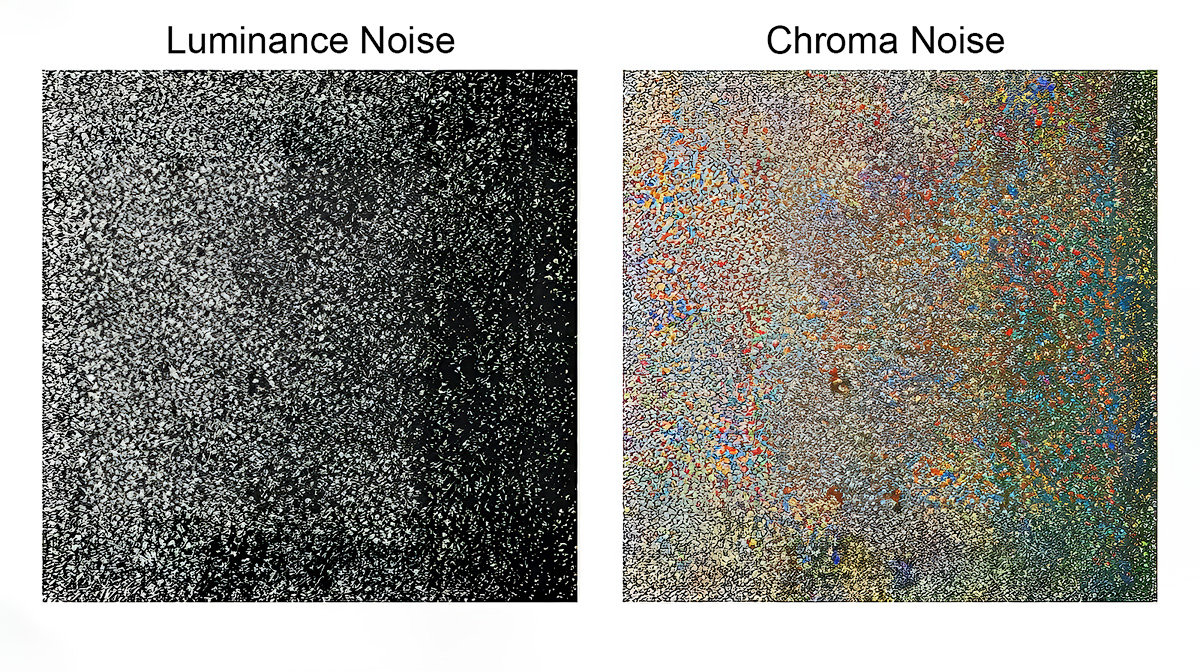
Luminance Noise (Film Grain)
Luminance noise appears as random grain or speckling, similar to traditional film grain, affecting the brightness value of each pixel. Signal levels are measured within individual pixels, and pixel characteristics such as size and quantum efficiency significantly influence the overall signal to noise ratio.
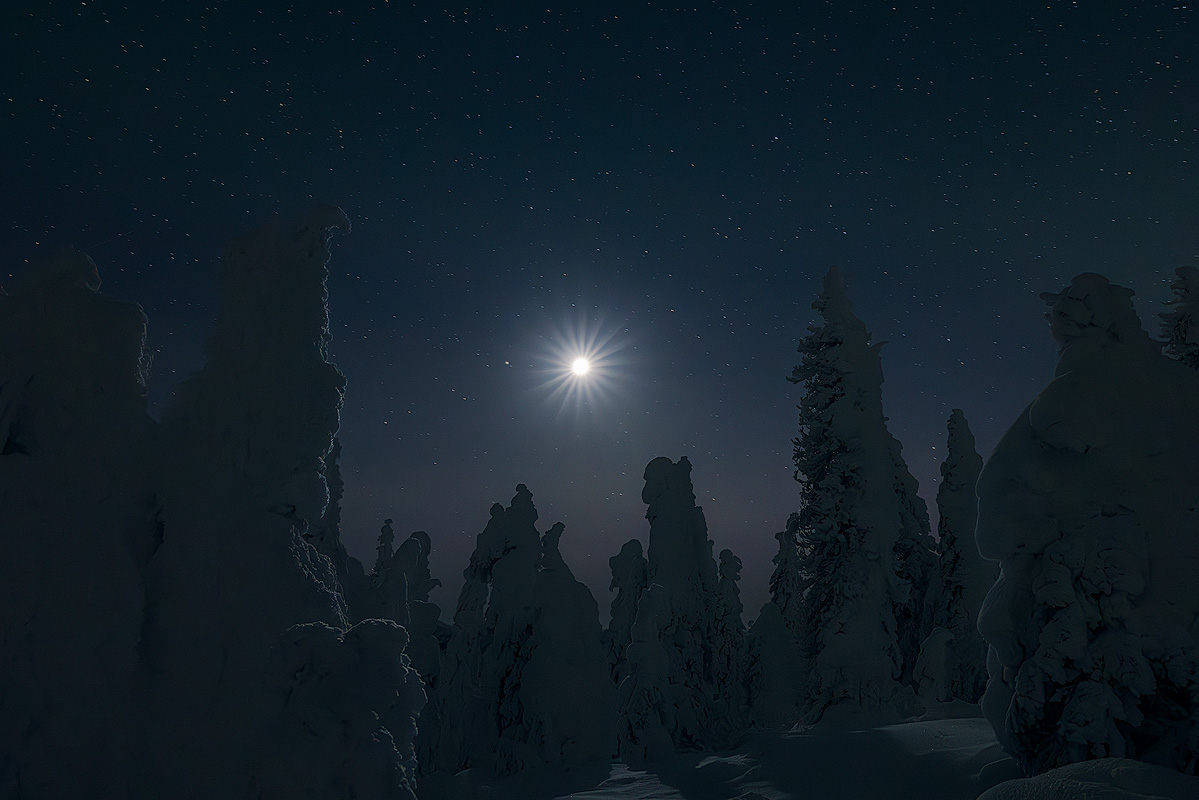
This type is more noticeable in darker areas of an image and can reduce image sharpness. Managing luminance noise is a primary concern for landscape and night images, where smooth areas like skies reveal even slightly noisy pixels.
Chroma Noise (Color Noise)
Chroma noise — also called color noise — manifests as distracting colored blotches or artifacts within an image, often in shades of red, green, or blue. It is generally more disruptive than luminance noise and can significantly impact color accuracy, especially in areas of smooth gradient.
Aggressive chroma denoising needs careful application to avoid desaturating important color information. Factors like camera sensor size also matter — smaller sensors inherently produce more image sensor noise at a given pixel density, making denoising a necessary step.
Shot Noise and Other Noise Types
Underneath the visible grain is photon shot noise — the most fundamental noise in photography. Shot noise results from random photon arrival rates: light itself arrives at the sensor unevenly, so even a perfect sensor records a random variation in signal from pixel to pixel. Photon noise follows a Poisson distribution, which has an important consequence for your photos, covered in the SNR section below.
A third visible form is salt-and-pepper noise, which appears as scattered dark and bright pixels rather than even grain. It often comes from sensor defects or extreme processing rather than light starvation. Whatever its form, the goal is the same: keep the real image signal strong enough that these random variations stay invisible.
What Causes Noise in Digital Photography?
Image noise enters your files from several sources, each capable of degrading what should be a clean capture.
High ISO Settings and Sensor Sensitivity
High ISO settings are the photographer's necessary compromise in low light. When you raise your camera's sensitivity, the sensor amplifies everything — signal and electronic noise alike — turning smooth tonal gradations into grain across the pixel grid.
Higher ISO means more amplification, which means more image noise becomes visible. Cameras with larger sensors and bigger individual pixels generally have better noise performance because each pixel captures more light signal, improving the signal to noise ratio. The full ISO story — including how modern cameras handle gain — lives in my ISO guide for landscape photography.
Sensor Size, Read Noise, and Heat
Smaller sensors packed with millions of tiny pixels generate more electronic noise. Each pixel receives less light signal, producing a weaker signal relative to the noise floor.
Beyond the light itself, the sensor system adds its own noise. Read noise comes from the readout electronics every time a frame is captured, and dark current builds as the sensor heats up during longer exposures, producing thermal noise that sometimes appears as hot pixels. Both read noise and thermal noise are independent of how much light you collect, which is why they dominate in the darkest, longest, or hottest shots — the dark current keeps climbing whether the scene is lit or not. Modern camera systems have lowered this noise floor through better readout electronics and on-chip processing.
Environmental and Exposure Factors
Shooting conditions directly affect noise levels. Low light forces compromises that amplify noise. Underexposure is particularly damaging — boosting shadows in editing amplifies the noise hiding in the dark tonal values, destroying clarity.
Temperature affects sensor performance, and light pollution in night images adds unwanted signal competing with your subject. Understanding these factors helps you set better camera settings at capture, where noise is cheapest to avoid.
Signal to Noise Ratio: What It Means for Your Images
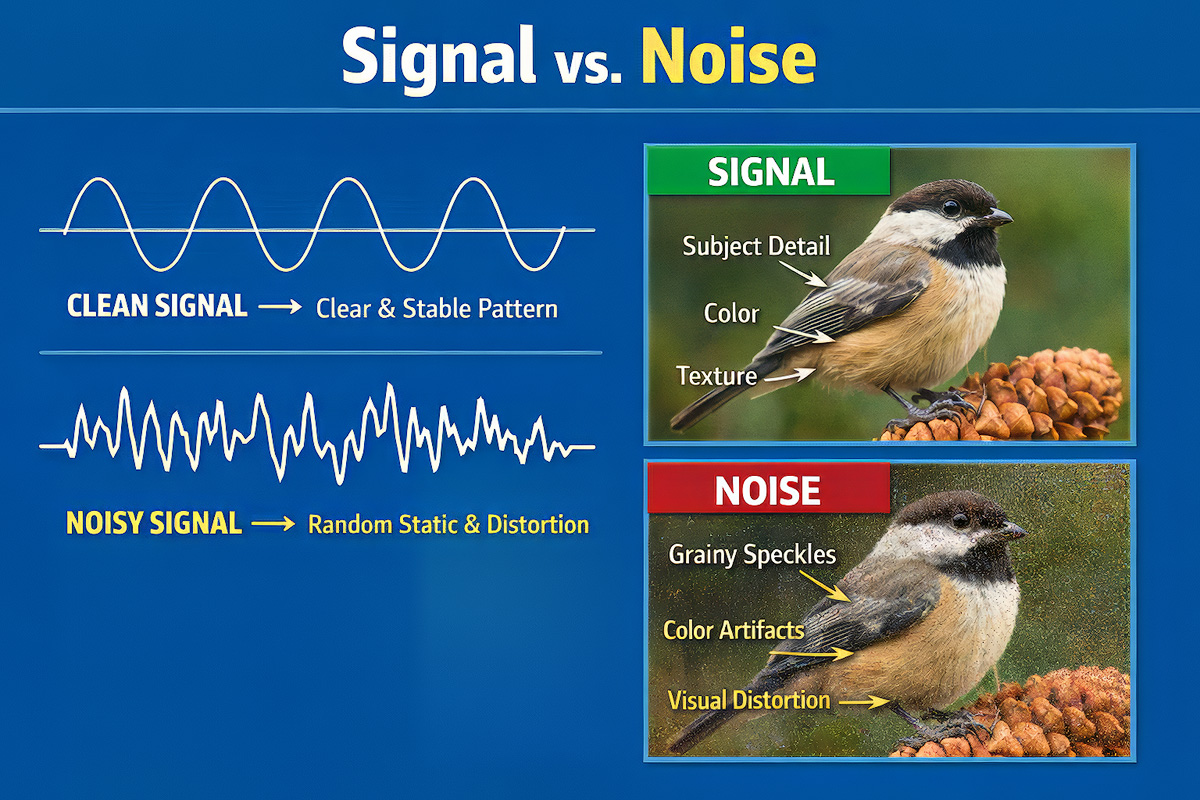
The signal to noise ratio (SNR) is the fundamental measurement determining image clarity. It describes the relationship between the useful information your sensor captures (the signal) and the unwanted random variation layered on top (the noise).
Higher SNR means cleaner images with greater clarity. Lower SNR means grain, loss of fine detail, and reduced contrast in subtle tonal transitions. Both the signal and the noise live in every pixel — the ratio between them is what your eye reads as "clean" or "muddy."
How SNR Affects Image Quality
There's a useful piece of physics here. Because photon noise follows a Poisson distribution, the noise grows with the square root of the signal — not in step with it. So every time you double the light you capture, the signal climbs faster than the noise, and SNR improves. This is why "expose for more light" is the single most reliable way to a cleaner file.
Improving SNR at Capture
The most effective approach starts before any editing. Every lever that puts more light on the sensor raises your SNR and minimizes noise before you ever open an editor. A wider aperture lets in more light; a slower shutter speed exposes the sensor for longer; a tripod lets you use both without blur; and lowering ISO when the light allows keeps amplification down. My exposure triangle guide for landscape photography covers how these settings trade off — for SNR, the point is simply that more light means a stronger signal.
The entire imaging system matters: the sensor, the readout electronics, and the in-camera processing all contribute to the SNR of your raw file. Cameras with larger sensors maintain remarkable clarity even at higher ISO settings.
The Difference Between Acceptable and Distracting Noise
Not all noise needs removing. A small amount of luminance noise can add pleasant, film-like character. The goal is keeping the noise level low enough that it doesn't distract from the subject or destroy fine detail.
What counts as acceptable depends on output. An image on a phone screen hides noise that would be obvious in a large print. Evaluate at your intended output size, not at 100% pixel zoom.
When to Apply Noise Reduction in Your Editing Workflow
The timing of noise reduction is a strategic decision. The general principle: apply it early, with crucial considerations for your RAW file.
Start with RAW Editing
Working with RAW images gives you the most unprocessed sensor data and maximum flexibility. Most professionals apply noise reduction as one of the initial steps — after basic RAW conversion and white balance correction, but before global adjustments.
Certain edits amplify existing noise. Increasing exposure, boosting shadows, or adding contrast all make noise more prominent. Starting with a cleaner base prevents these compounding issues.
Pre-Emptive Denoising for High-ISO Images
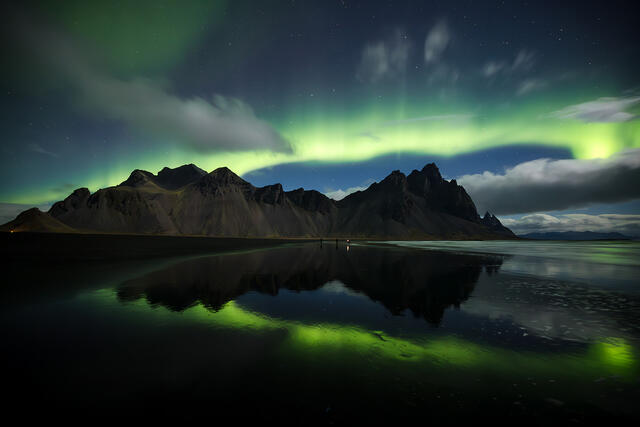
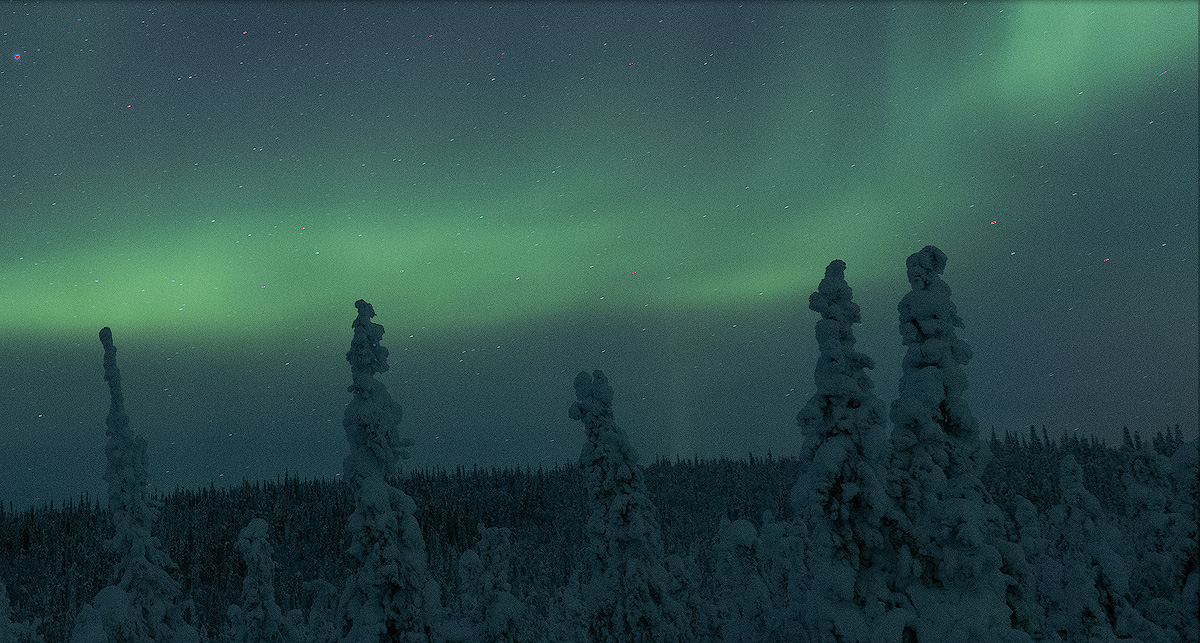
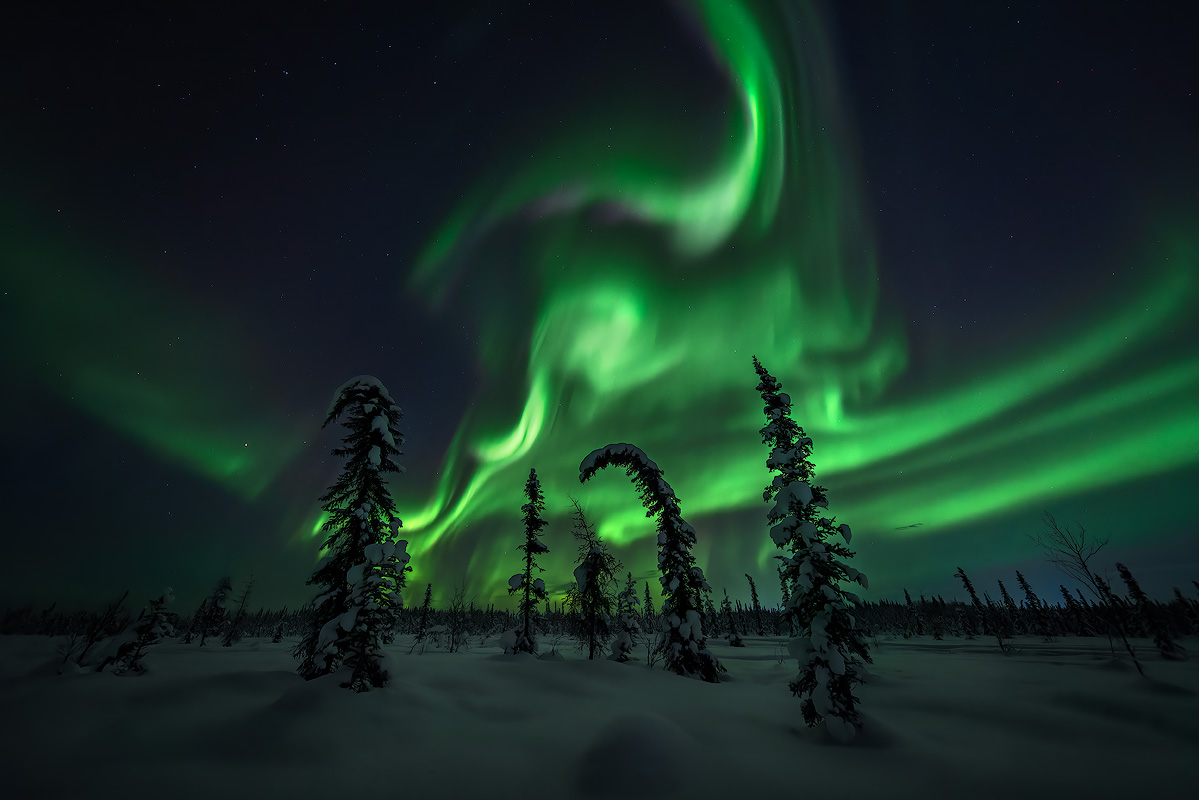
For heavily noisy images captured at high ISO or in low light — night shots, Milky Way captures, indoor events, or when you photograph the Northern Lights — applying noise reduction early creates a dramatically cleaner foundation.
Software like DXO PureRAW or DXO Photo Lab 8 (featuring Deep Prime 3 and Deep Prime XD3) can generate a significantly cleaned DNG file before you import into your primary editor. This leverages AI-powered noise removal at its most effective stage.
Set White Balance and Lens Correction First
Finalize white balance and lens correction before aggressive denoising. Incorrect white balance can interact negatively with noise reduction algorithms, and lens distortion corrections redistribute pixel data in ways that affect results.
Ensure white balance is accurate, lens correction profiles are applied, and chromatic aberration is corrected. Then proceed with denoising on a properly calibrated file.
When to Denoise Later
This early approach isn't always necessary. If an image has a low noise level or you're making subtle adjustments, you can denoise later — even as one of the final steps before output sharpening. The key is understanding whether your edits will amplify noise or leave it unchanged.
How to Remove Background Noise from Images
Removing noise from an image requires the right method and tools within a thoughtful landscape photography post-processing workflow. The goal: reduce distracting noise while preserving detail, contrast, and the features that make the image compelling.
Global vs. Local Approaches
Noise is rarely uniform across a frame. Shadows contain significantly more noise than highlights. A two-pronged approach works best.
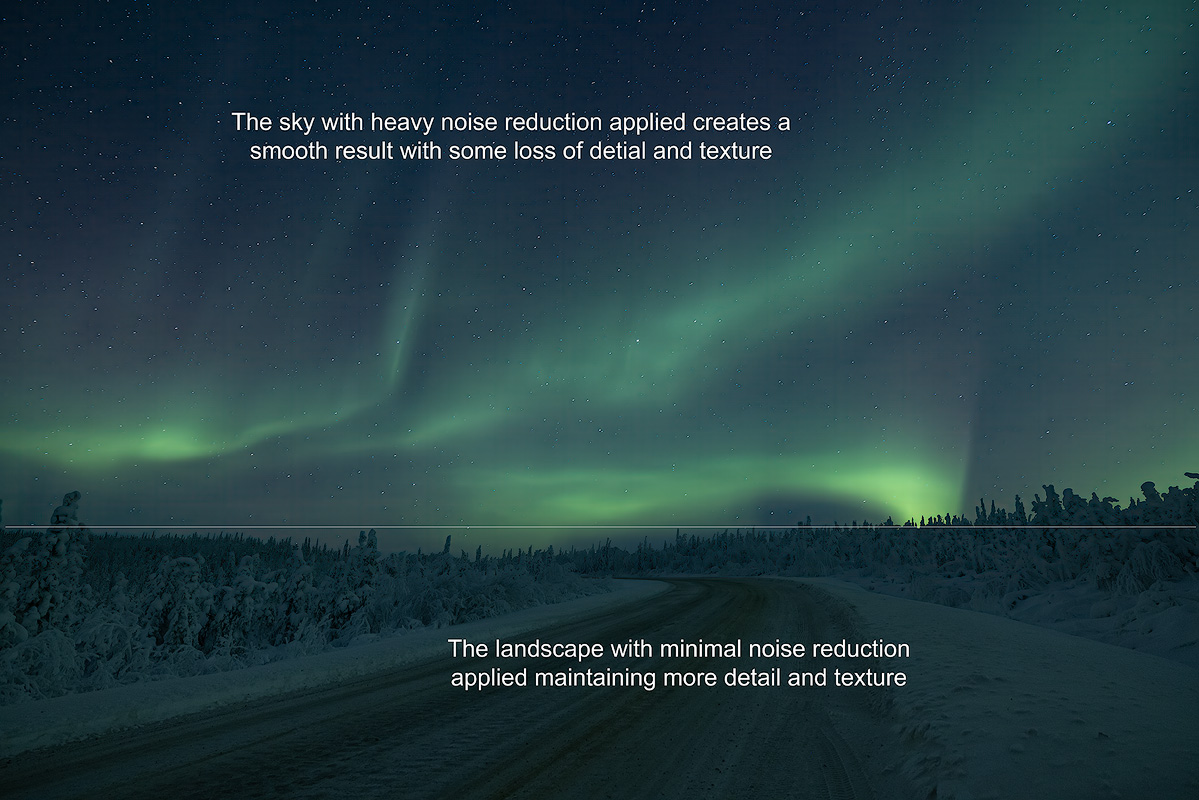
Global denoising addresses the overall noise floor — a baseline cleanup across the entire frame, typically your first pass using a RAW editor's built-in tools or dedicated software.
Local adjustments target specific problem areas. Luminosity masks, the brush tool, radial filters, and graduated filters let you apply stronger denoising in noisy regions while leaving sharp areas with their natural sharpness. AI masking in newer software can detect areas needing treatment automatically.
Avoiding Over-Processing
The primary pitfall is overdoing it. Aggressive denoising leads to loss of sharpness, unnaturally smooth surfaces, and blur. Your image should retain natural character — skin pores in portraits, individual blades of grass in landscapes.
If the image looks filtered through wax at 100%, pull back the strength until clarity returns, then evaluate at normal viewing size. Noise visible at the pixel level often disappears at final output size.
Best Noise Reducer Software for Photographers
Choosing the right noise reducer makes a measurable difference in image quality. Different algorithms vary in their ability to distinguish noise from real content, and the performance gap between tools has widened as artificial intelligence has transformed the field.
Dedicated AI Tools
Specialized software generally outperforms built-in editor options, especially for high-ISO images.
DXO PureRAW / DXO Photo Lab 8 — Features Deep Prime 3 and Deep Prime XD3, setting the standard for AI-powered denoising. Feed it your RAW file and it outputs a clean DNG ready for your primary editor. Performance on high-ISO files is exceptional, preserving pixel-level detail that other tools lose.
Topaz DeNoise — A powerful standalone noise reducer and plugin. Works within Lightroom or Photoshop, effective on extreme noise, though compare results against DXO for your specific camera system.
Built-In Editor Options
Adobe Lightroom Classic CC — AI Denoise handles luminance and chroma noise effectively, convenient for mid-workflow noise reduction at moderate noise levels with seamless integration into your existing workflow.
Capture One — Strong denoising with fine control over luminance and chroma channels separately, valued for color accuracy and its selective adjustment tools.
Recommended Two-Stage Workflow
For demanding images: run your RAW file through DXO PureRAW first, creating a denoised DNG with maximum clarity. Import that DNG into Lightroom or Capture One for remaining edits — color grading, exposure, selective corrections, and output sharpening. This lets each tool do what it does best.
Noise Reduction and Sharpening: Getting the Order Right
Denoising and sharpening are closely linked and interfere with each other if the sequence is wrong.
Always Remove Noise Before Sharpening
Sharpening a noisy image amplifies every grain particle alongside actual content. Effective noise reduction first creates a clean foundation where sharpening enhances only true edges and detail.
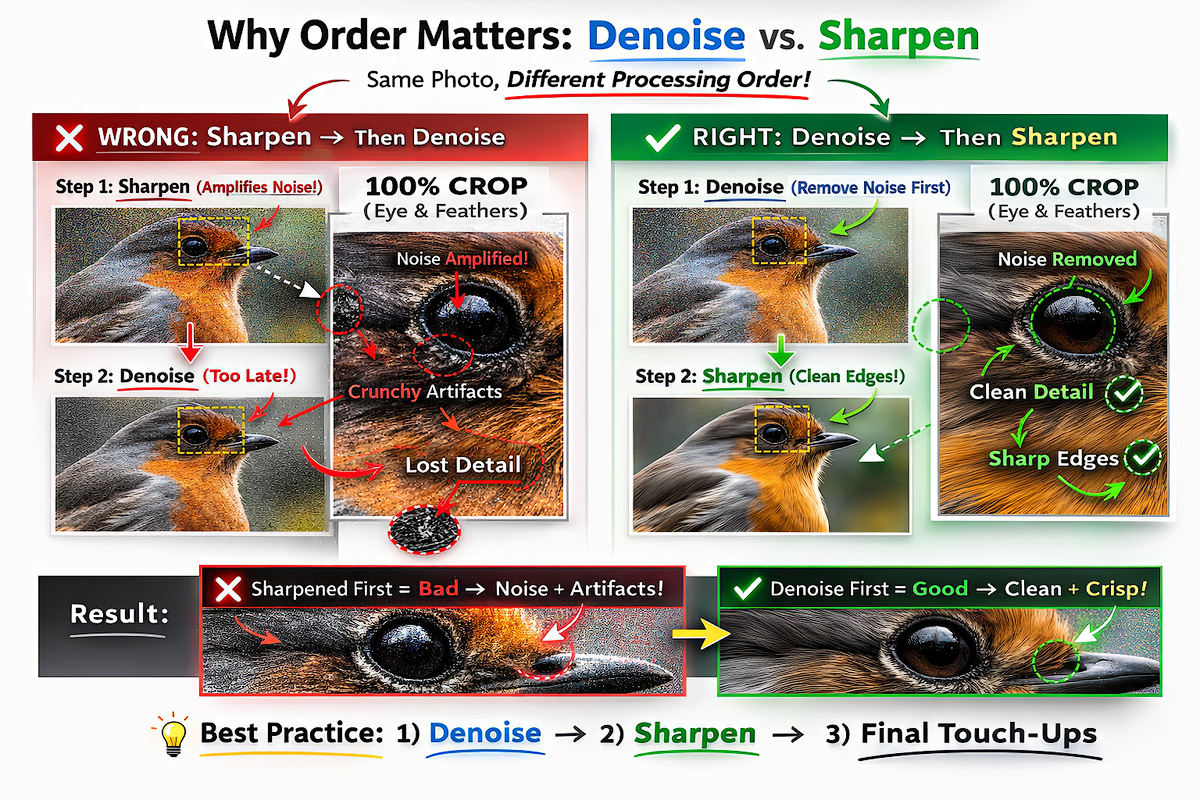
This applies to capture sharpening (counteracting the softness inherent in digital capture) and output sharpening (tuned to delivery format and size).
Balancing Smoothness and Detail Preservation
Find the threshold where noise is filtered to an acceptable level without crossing into blur or loss of fine detail. Modern AI tools handle this better than traditional methods because they distinguish random noise patterns from structured image content at the pixel level.
For critical images — portfolio work, large prints, commercial deliverables — test at multiple strengths and compare at your intended output size. A slightly noisy image that keeps its character often looks better in print than an aggressively cleaned one that appears unnaturally smooth.
Core Principles for Effective Noise Reduction
These principles consistently improve results across every type of image.
Always Work with RAW Files
RAW files contain maximum unprocessed data from your sensor, offering unparalleled flexibility. JPEGs have undergone compression — pixel data crucial for separating noise from real detail has been discarded.
Converting to DNG after running a dedicated noise reducer like DXO PureRAW keeps the RAW advantage throughout your workflow. The ability to adjust white balance and color temperature without degradation is critical.
Multi-Stage Approach for Challenging Images
For demanding scenarios — Milky Way shots, high-ISO wildlife captures, underexposed recoveries — a multi-stage approach delivers the best results.
Apply initial denoising in DXO Photo Lab 8, then refine in your primary editor using luminosity masks for localized adjustments. This layered method gives precise control across different areas of the image, preserving detail where it matters most.
Leverage Selective Adjustments
Use luminosity masks, layers, and selective brushes to target only problem areas. Reduce noise aggressively in shadow areas while leaving brighter, sharper areas with full clarity.
AI masking features can create selections based on tonal value automatically, saving time without sacrificing quality.
Batch Editing for Efficiency
For large shoots, batch denoising saves significant time. Set and test your settings on a representative image first, then apply across the set.
Most editors and noise reducer applications support batch workflows. Spot-check results, as different exposures may need different treatment depending on ISO and light conditions.
Consider Your Final Output
How much cleanup you need depends on where the image will be viewed. Large prints require cleaner files than social media posts, where noise is far less noticeable at normal viewing size.
When preparing for print, make sure noise reduction has been optimized for the resolution and color depth your output demands. What looks acceptable on screen can become distracting at large scale.
Frequently Asked Questions
What Is a Good Signal to Noise Ratio in Photography?
Higher SNR always means a cleaner image. Photos shot at base ISO (100–200) with proper exposure have excellent SNR. As ISO climbs above 1600–3200, SNR drops and noise reduction becomes more important. Cameras with larger sensors and lower pixel density maintain higher SNR across all ISO settings because each pixel captures more light signal.
What Are the Main Types of Noise in Photography?
There are three you'll actually see. Luminance noise is monochromatic grain that looks like film grain and affects brightness. Chroma noise, also called color noise, shows as red, green, or blue blotches in smooth areas. Salt-and-pepper noise appears as scattered dark and bright pixels. All trace back to photon shot noise — the random variation in how light arrives at the sensor.
What Causes Noise in Digital Photos?
Noise comes from a weak signal relative to the noise floor. The main causes are high ISO (which amplifies noise along with signal), small sensors with tiny pixels, underexposure that forces heavy shadow recovery, and heat from long exposures that raises dark current and read noise. Low light underlies most of them, because less light means a lower signal to noise ratio.
Is a Little Noise Ever Acceptable in a Photo?
Yes. A small amount of luminance noise reads as pleasant, film-like grain and rarely hurts an image. What matters is keeping the noise level below the point where it distracts from the subject or erases fine detail. Judge it at your intended output size — noise that's obvious at 100% zoom often vanishes in a normal-sized print or screen view.
Does Removing Noise Reduce Image Quality?
It can if overdone. Excessive denoising removes fine detail along with noise, creating an unnaturally smooth, waxy appearance. The key is balance. Modern AI-powered noise reducer tools handle this far better than older methods, preserving contrast and image sharpness while filtering grain.
What Is the Best Noise Reduction Software for Photographers?
DXO PureRAW and DXO Photo Lab 8 (with Deep Prime XD3) consistently produce top results for RAW file denoising. Topaz DeNoise is a strong plugin alternative. Adobe Lightroom Classic CC's AI Denoise and Capture One both perform well for integrated workflow use. For demanding images, a two-stage approach delivers the highest quality.
Michael Schultz is a landscape and nature photographer based in Fairbanks, Alaska. Face The Outdoors has been featured by National Geographic. He leads small-group photography workshops in Alaska, Norway, the Dolomites, and other locations through Face The Outdoors Photography.